How To Export a Sound Pack
Once you have created a sound pack that you would like to share with the community or a friend, you can easily export it from the file menu.
The Steps
- Open the session file (
.sp2) for the pack. - Select
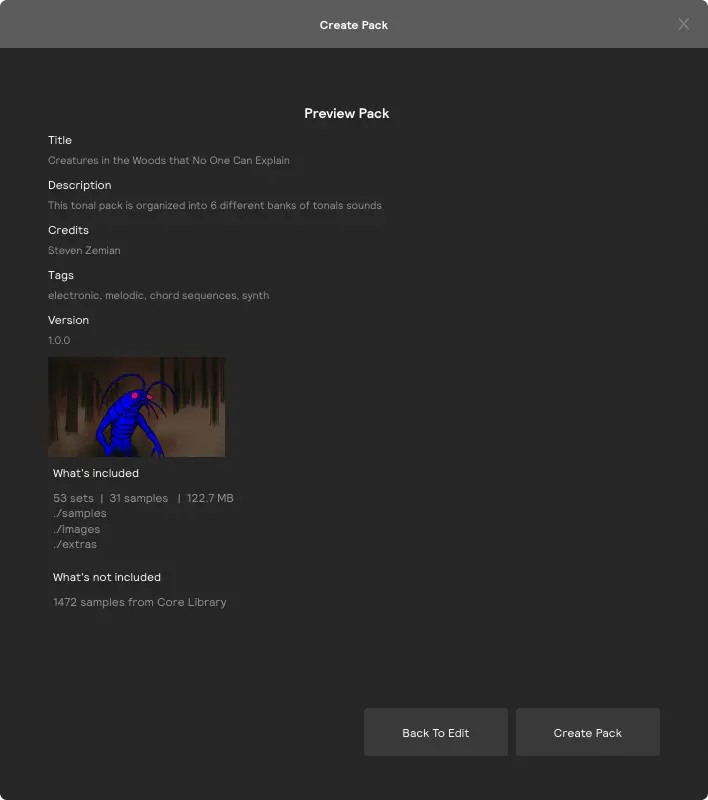
Export sound packfrom the File menu. - Fill out the metadata for the pack (Title, Description, Credits, Tags, Version).
- Select a pack image.
- If you have a samples folder to include with the pack, you can select “Include all audio files in samples folder” to include even the unused audio files in the samples folder. If you don’t have a samples folder, or you only want to include the samples that are used in .sp2, you can leave this unchecked.
- Select
Preview Pack, and if everything looks good, selectCreate Pack. - Test the installer by double clicking the
.spzyou created, or by selectingInstall sound packfrom the File menu. The pack is saved to Music/Sunhouse/Sensory Percussion 2/user packs and will show up underUser Packsin the library. - Send the .spz to your friends and upload it to the Sunhouse Forum to share it with the community.
If you use samples from the Core Library, or official Sunhouse sound packs, these will not be included in the pack installer.
This doesn’t matter for Core Library samples (since they are included with Sensory Percussion 2 and all users have these samples), but take note of any sample dependencies on Sunhouse sound packs, because the user will have to install them in order for the samples to link.
These dependencies will be listed in the pack creation wizard when you preview the pack.

Best Practices
Samples Folder
You might want to include extra samples in your pack that you didn't use in the session. You can do this by including a folder named samples next to the .sp2 file before you export the pack.
If that folder exists, it will preserve the folder structure when exporting the pack. If that folder doesn’t exist, it will essentially Collect and Save the session, which gathers all of the linked audio files and puts them in a flat list in a newly created folder called samples.
If you didn’t use a nicely organized samples folder when you first started creating the pack, but want to add one later, here’s a trick:
- Move your .sp2 file somewhere else on your computer (which will break all of the links to your samplers in the session – that’s good, that’s what we want).
- Organize a new sample folder nicely how you like it, name it
samples, and put it next to your .sp2 file. Make sure to include all of the samples used in your session: don’t leave any behind! - Repair the broken samples and select the nicely organized folder you made in the previous step.
Extras Folder
If you have extra stuff to send along with the pack (think templates, additional Sensory Percussion 2 sessions_, videos, README.txt, etc) you can include a folder named extras next to the .sp2 and the pack exporter will include it in the .spz, and you can access them in the library by selecting the pack and clicking the extras button in the bottom right corner.