How to Navigate Complex Sets
The modular structure of Sensory Percussion 2 allows you to create complex systems of interconnected modules. With the capacity for a single layer to hold hundreds of modules, each of which containing their own submodules, you can go as deep as you want! The problem is that there is only so much space on the screen to show all of these modules. When you're working on a super complex set, it's easier to lose track of some modules. So here are a few tips to save you time when navigating a complex set in edit view:
Follow the Breadcrumbs
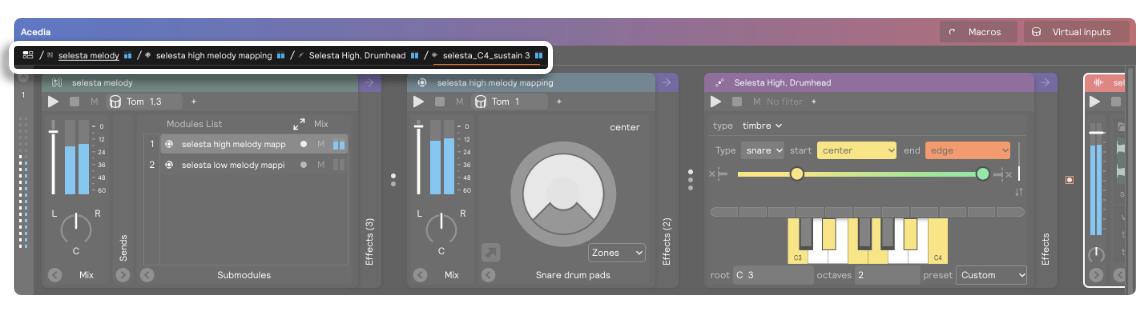
This bar is a helpful way to navigate your set, especially if it has lots of long, complex chains of modules. The bar lists all of the modules that are currently visible in whatever layer you have selected. If you change the name of a module, this will be reflected in the breadcrumbs bar.
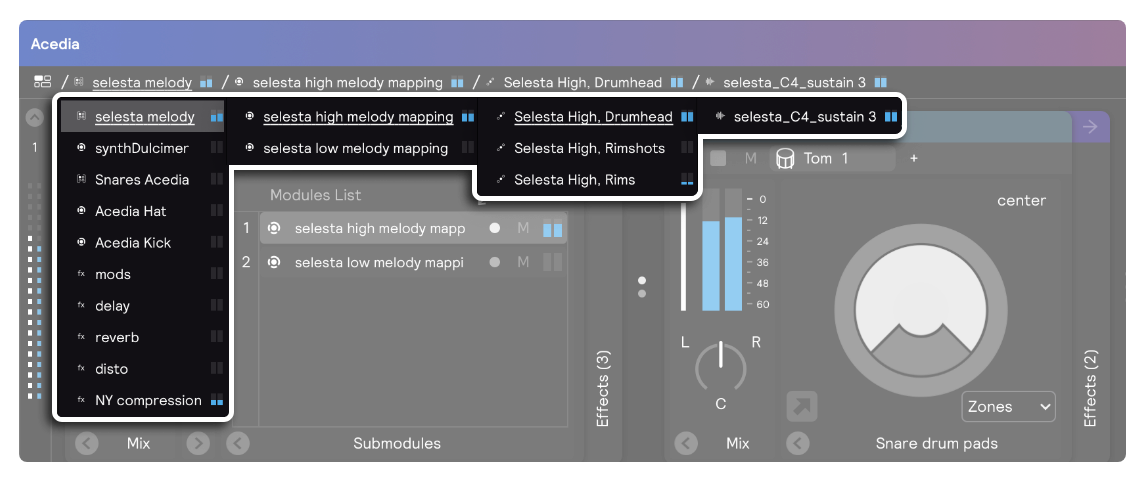
And If you right-click the name of a module in the breadcrumbs bar, you will then see a drop-down that gives you access to that module, all of its sibling modules, and all of the modules they contain. That means that when you right-click the top module in the breadcrumbs bar, you can see ALL of the modules in your entire set! This is a great way to navigate complicated sets. Because all of the modules in this dropdown have blue VU meters, you can easily identify which modules are sounding when you play. Hit the drum/zone you're trying to identify with this drop-down open and follow the blue VU meters!
Group Controller is Your Friend
While some controllers perform complex multi-step operations on their submodules, group controller it pretty straightforward: it groups things. But don't let its simplicity fool you; grouping modules/layers is a powerful organizational tool that can help you turn a visually overwhelming set into a nicely organized set that is easily manageable.
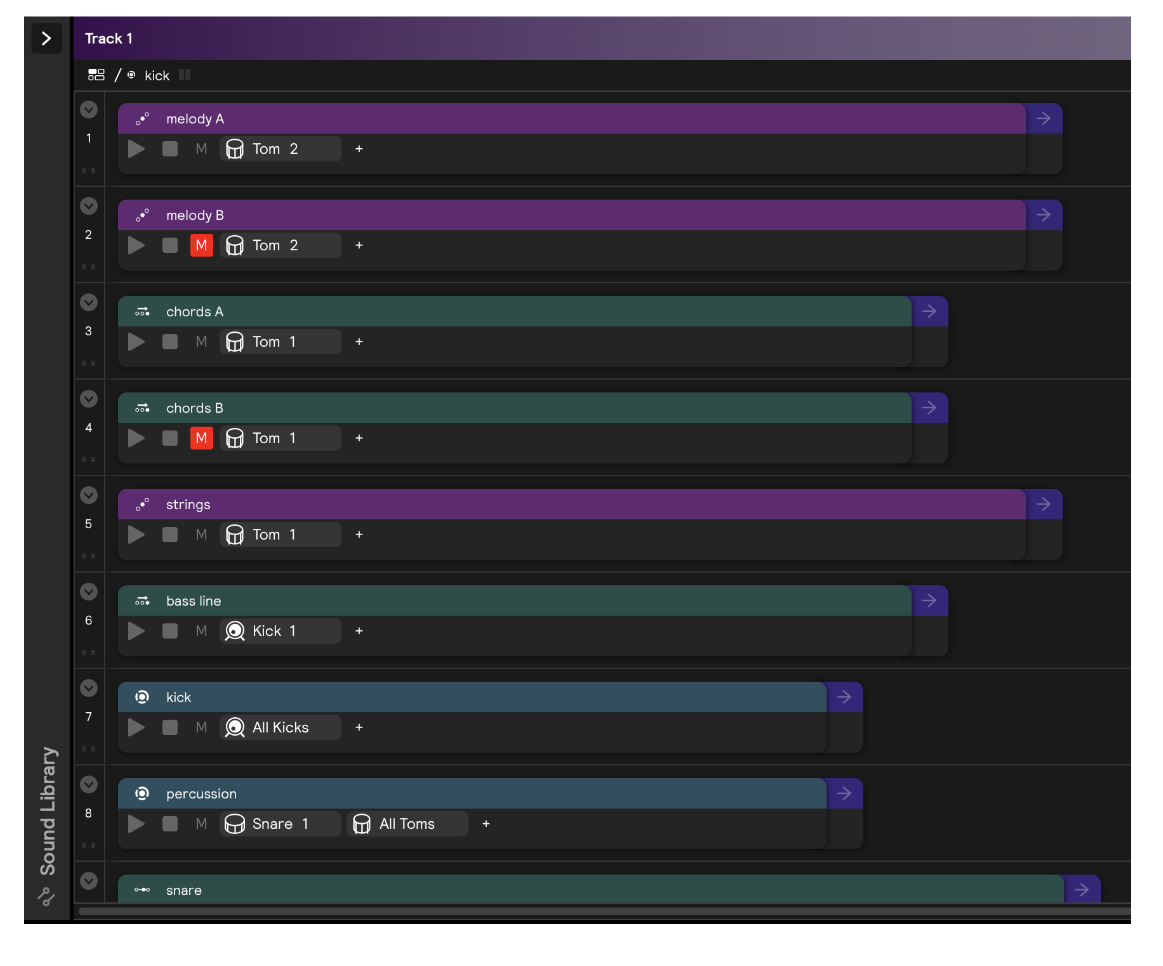
Below is an example of a set with lots of different layers that were created based on what kind of sounds they contain, much like the different parts of an orchestral score. As you can see, even with each layer collapsed vertically, there are too many layers to fit on the screen:
If you're just working on one particular sound inside one of these layers, you might not want to have to scroll through all of these the whole time. That's where grouping comes in handy.
To simplify this example, we selected all of the layers with melodic sounds (chords, bassline, melody, strings, etc.) and created a "melodic" group using right-click > Group Into... > Group. We then did the same thing with drum sounds and a third time for miscellaneous sound design layers. Now, the default view of the set is just 3 layers. All of the complex networks we created are still there, and they each retain the input filters that they had before, the only difference is that it's now easier to navigate visually.