Audio Buses & Sends
Sends and audio buses are two sides of the same thing. Sends let you route audio from any module--at any level--to an audio bus, where you can host effects.
This provides some important benefits. It lets you avoid duplicating effects you might want to have on multiple layers. Instead of putting the same effect on each layer (and then having to go to each one when you want to tweak it), you can send each layer to the same Audio Bus and put the layer there. Not only is this a more efficient way to organize your set, it also saves a ton of CPU resources.
Adding an Audio Bus
To create an Audio Bus, first go to the module that you want to send to it. Look for the "Sends" panel on the module (you might need to reveal it if it's hidden by clicking the icon in the top-right of the module).
-
Click the
+button at the bottom of the panel. -
In the menu that pops out - either create a new Audio Bus, or choose an existing one.
-
A new send knob will appear in the panel - adjust the amount you are sending as you like. Right-click the knob to add an assignment.
- You can rename the new Audio Bus by scrolling down to the module at the bottom of the edit screen and double clicking its name in the title bar.

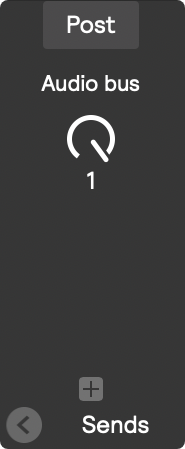
Pre or Post Sends
There are two modes for each send: Pre or Post.
Choosing "Pre" will send audio from the module before it goes through any volume/mute/pan settings on the same module.
For example, if you have a module that you have panned hard left that is also sending to an audio bus in "Pre" mode, the audio bus will receive un-panned sound.
In "Post" mode, the audio would be sent panned. "Post" is the default mode for sends.
Parallel Effects Processing
Parallel effects processing allows for some really cool sound design techniques that are not possible without audio buses.
Simply put: sometimes you want an effect embedded in the sound, and sometimes you want to duplicate the sound and have a completely “dry” layer mixed with a completely “wet” layer.
It may seem like a subtle distinction (since you can always set the mix knob of the effect to 50%), but there actually is a major difference. For example: if you have a reverb as a layer effect, and you decide to stop the sound by muting the layer, then the reverb tail will also be sharply cut off.
But if you send the layer to an audio bus with a reverb effect, then when you mute the layer the reverb tail will still decay naturally.
Reverb is a great example for why parallel effects are useful, because of the way it behaves in the natural world. If you picture someone singing in a cave: the sound of the cave doesn’t happen until after she has already sung the notes. There is the direct sound of her voice, and then milliseconds later we hear her voice bouncing off the walls of the cave.
That’s why it sounds unnatural to put a reverb effect with the mix knob set to 100% directly on a sound: in the real world we almost never hear reverb without hearing at least some direct sound.
Another great Parallel FX technique is called Parallel Compression. It’s the secret to really BIG sounding studio quality drums: by sending your drums to a compression bus you get the big fat sound of compression, but the dry track allows the transients of your drum hits to not be squashed. It’s called New York Compression when you add an EQ to the compression channel that reduces the mids.