Sampler
Samplers contain assignable parameters for editing and controlling the sample contained within. Samplers receive trigger messages (and other messages) from the pads/controllers that contain them. If you drag an audio file onto a layer/controller, a sampler module will automatically be created with that audio file inside of it. Alternatively, you can drag in an empty sampler module and then drop an audio file into it.
The Sampler is a generator, which is a type of module that actually makes a sound, while a controller affects the relationships between sounds/inputs. Generators are essential; without some type of generator in your layer, you will not hear anything when you strike the drum.


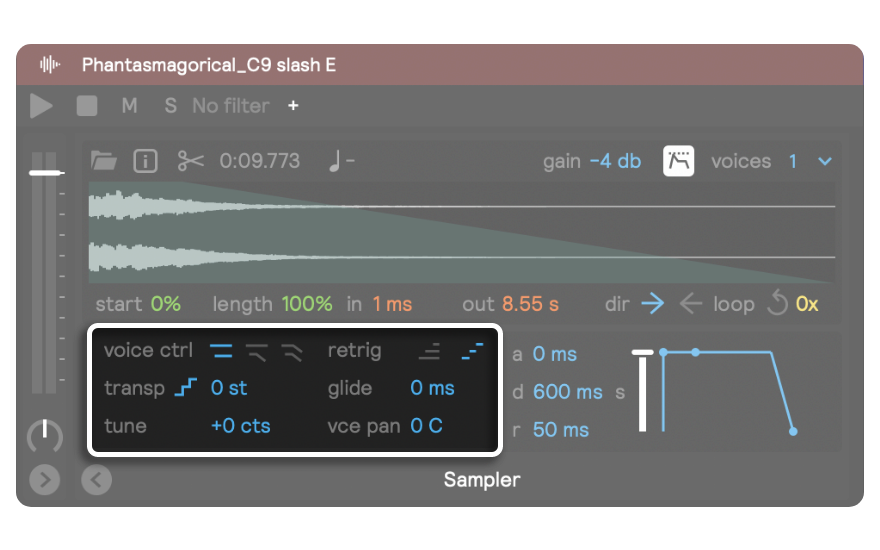
The image above shows a sampler containing a chord sample from our library.
Sample Waveform
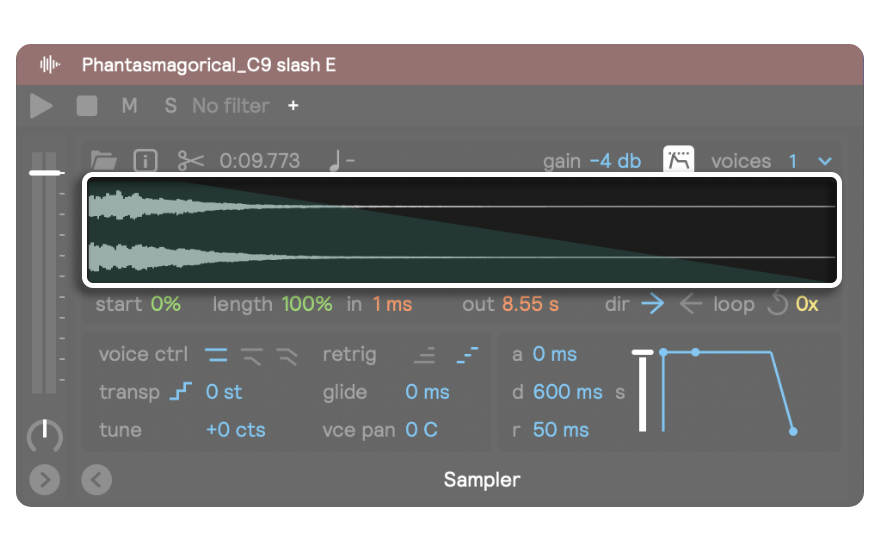
You can zoom in/out on the waveform by clicking and dragging up/down. The green highlight box in the waveform display will update as you make changes to the playback controls below it. Increase the start parameter and you will see the green box move to right, increase the fade in and you will see the left edge of the box move from vertical to horizontal, etc.
Info Bar
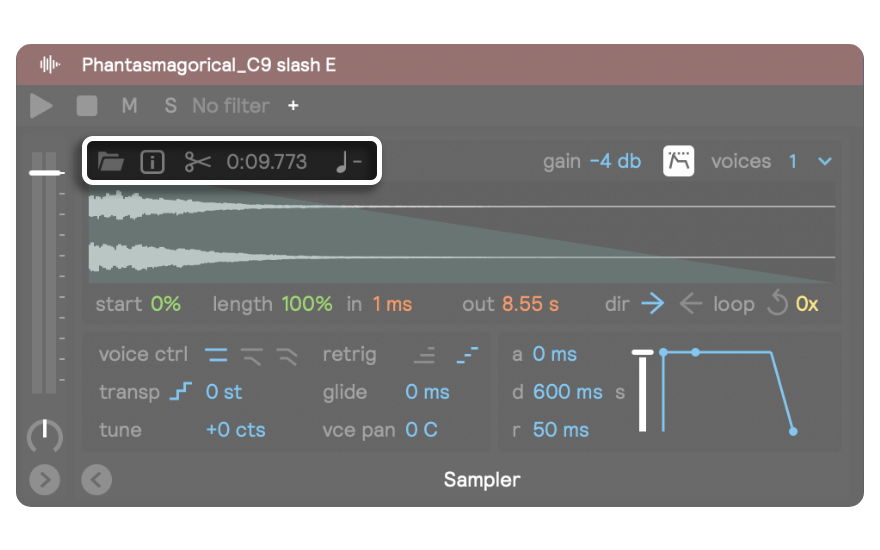
This top bar is global information about the sample. These parameters are not intended to be used for creative sound design, but rather for correcting samples to work together with other samples in your set.
Sample Location
Clicking this folder icon will open Finder/Explorer and show you where on your computer the original sample file is located.
Sample information
Clicking this icon will open up a panel that tells you information about the original sample file. All of the information on the right-hand side (Duration, File Size, Sample Rate, Bits per Sample, Channels, and Formant Type) is describing the unaltered sample in its original state.
There are two parameters in this panel that can be altered: Root Note and Detune. These two parameters work a lot like the “transpose” and “tune” parameters of the sampler, except they’re only relevant if the sampler is inside of a Note Controller, or you’re playing it with an external MIDI keyboard. Otherwise, you won’t hear any difference in the playback pitch while adjusting these parameters. Drums don’t send notes; they send hit messages, so you won’t hear a difference.
Changing the root note in this panel allows you to use multiple samples that are different notes within the one Note Controller scale.
For example, say you have a note controller set to the major scale and two samplers inside of it: one synth sound that’s a C3 and one bass sound that’s a D3. These are going to sound dissonant played together with the same scale applied to both. But if you open up the Sample Information panel for the D3 bass sample and change the Root Note to D3, Sensory Percussion will now adjust the pitch relative to that root note, and the two samples will sound good together. Click “save to file” to remember this root note. (Note: This will save over the metadata of the original sample file on your computer, but it won’t change the pitch of the audio sample).
Sample Trim
Clicking this scissors icon opens up a new waveform window, where you can trim the beginning and end of the sample by adjusting the yellow cursors left/right. This is helpful for dealing with samples that have dead space at the beginning or end. Once you close out of this window, you will see your changes reflected in the sampler waveform, and you will also see the time value (expressed in 00:00:00 format) change above the waveform.
Gain/Voices
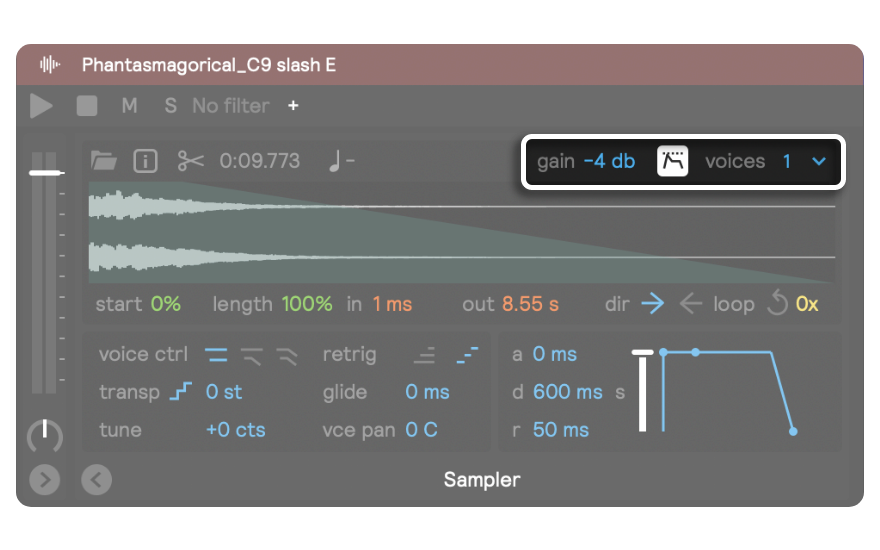
Voices
This number refers to the number of voices that the sampler will play before a new voice overtakes a currently sounding voice. By default, the number of voices is set to 4. If you want a more vintage feel (where voice stealing will occur with fewer hits) you can set the number lower.
Gain
This box allows you to adjust the gain of the recorded sample. This is distinct from the volume meter of the sampler, which allows you to adjust the playback volume. When you adjust it, you will see your changes reflected in the size of the waveform below.
Auto-Gain
By default, auto-gain is turned on, which sets the gain value to -4 dB. This normalizes the sample so that samples recorded at different volumes will respond evenly to your playing. If you adjust the gain manually, this auto-gain indicator will automatically turn off.
Playback Controls
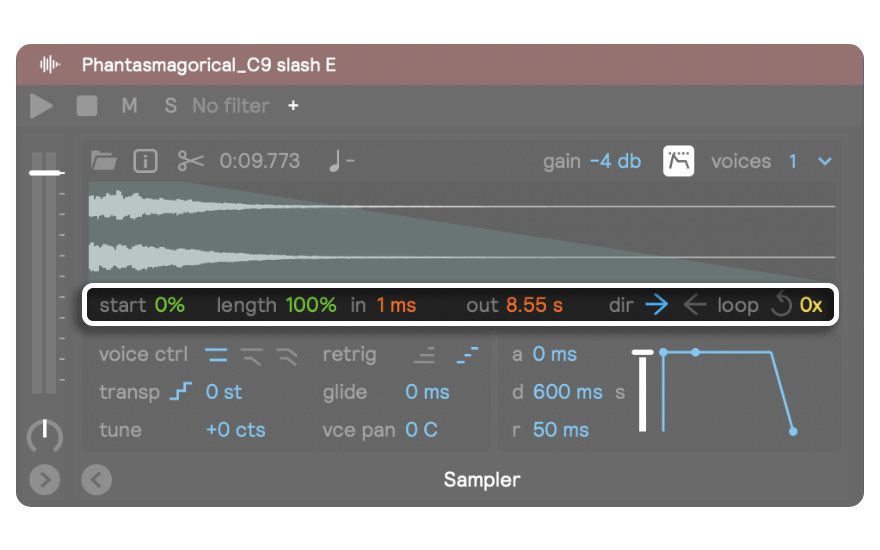
Sample Start/Length
You can adjust the start and length of the sample by typing in or dragging these number boxes. You can also right-click them to create an assignment. (Note: “length” is not the same as “endpoint;” adjusting the start time will also adjust the endpoint of the sample if length is set to less than 100%)
Fade In/Out
You can control how long of a fade in or out you want on the sample by typing or dragging these number boxes. You can also right-click them to create an assignment. When you adjust these values from their defaults, you will see the slope of the beginning/end of the green box on the waveform adjust accordingly.
Direction
Sampler direction is set to forward by default, but clicking the back arrow will reverse the playback of the sample.
Loops
You can set a sampler's playback mode to "loop" by clicking the yellow arrow and then type or drag the number box next to it to set the number of times you want it to loop. By default, it’s set to 0x, which will loop the sample infinitely (setting it to 1x is the same as having “Loop” off.) The sampler will loop the sample based off of the adjustable sample length (green box on the waveform).
Pitch/Voice Controls
Voice Control
These three modes of pitch control are only relevant when you have an assignment on the pitch parameter of a sampler. By default, samplers are set to Next mode, in which each re-pitched note tail layers over the previous note.
In Last mode, the last note tail played will slide to the new pitch, while the others will stay layered.
And finally, All mode slides all of the note tails to the new pitch, regardless of the order they were played. Keep in mind the interaction with the “retrig” parameter. For true layered behavior, you want the voice mode set to Multi and for slide behavior you want the voice mode set to Retrig. You can clearly hear the difference between these modes if you assign an LFO to the pitch parameter of a sampler and switch between them while triggering the sampler.
Retrigger
This allows you to switch between the two voice modes: Multi and Retrig. When voice mode is set to Multi, the sampler will layer a new voice for each new hit. If it is set to Retrig, then each new voice will choke the previous.
Think of Multi as behaving like a harp, where each new note played overlaps with the previous note ringing out, and Retrig like a human voice, where only one note can ring out at a time.
Transpose
Here, you can pitch the sample up or down in semitones by typing in or dragging the number box. You can also create a pitch assignment by right-clicking on the sampler.
When transpose is on, it’s locked to intervals of half-steps. When it’s turned off, it becomes smooth with intervals between whole numbers.
Glide
Sets the amount of time it will take a new note to transition from the previous note.
Tune
You can make minor adjustments to sample pitch with the "tune" parameter (in cents). This only applied to new notes, meaning when the sampler is inside of a note controller or there is something modulating the transpose/tune parameters.
Voice Panning
This parameter works a lot like the regular panning knob, but it acts on individual voices. So, if you have an assignment modulating this parameter and you play the sampler, it will sound like regular panning. But if you hit it again, the new voice will starting bouncing left to right, with the previous voice freezing wherever it was when the new hit occurred. Combining this parameter with the different voice modes and the transpose parameter can yield some very interesting results.
Attack, Decay, Sustain, Release

Attack, Decay, Sustain, Release
The envelope of the sampler playback can be edited by typing/dragging the number boxes and/or by dragging the blue dots on the envelope. You can create an assignment on any of these parameters by right-clicking them.
Note that adjusting attack/release has a very similar effect to adjusting fade in/fade out in most cases. The main difference is that release only happens when the sample is choked, which can happen anywhere in the course of the playback of the sample. Fade out, on the other hand, is always going to happen at the same part of the sample that you originally set it to. Basically, fade in/out is simpler; it's good if you just want to remove a click or adjust a sound every time a sample plays. Attack/decay/sustain/release adjustments are more for shaping notes in an expressive way.