Drum Training
Training a Sensor Input
If you didn't train your drums through the Guided Setup, you can do so at any time by clicking the Edit button on the bottom-right of each Drum Sensor Input. This process teaches Sensory Percussion to recognize your playing on that particular drum. You only have to do it once per drum and it's a pretty quick process!
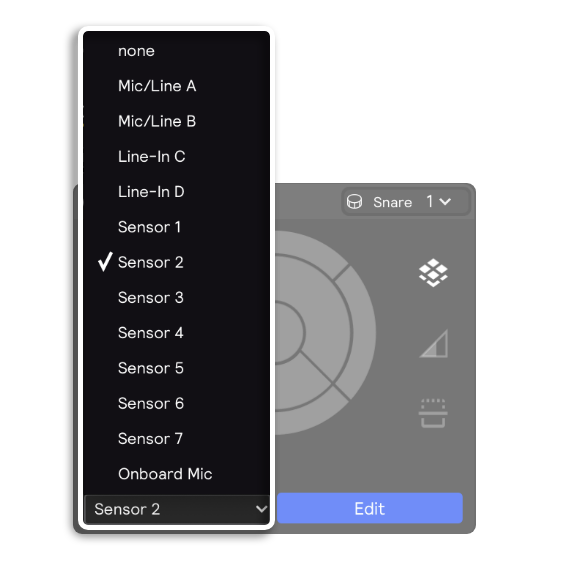
First, make sure the Drum has the correct Input Channel selected -- this will correspond to the input jack you are using on your interface.
Then, click the Edit button to open the training window.
Training Window


On the left side of the training page, you can manage various input parameters: channel, name, velocity i/o, threshold, and sensitivity.
On the right side, you can manage your trained zones using one of two different panels: Guided Training or Manual Training.
Guided Training
Once you enter the training window, start Guided Training by clicking the drum icon next to where it says "Level 1: Drumhead & Rims" in the top-right panel.
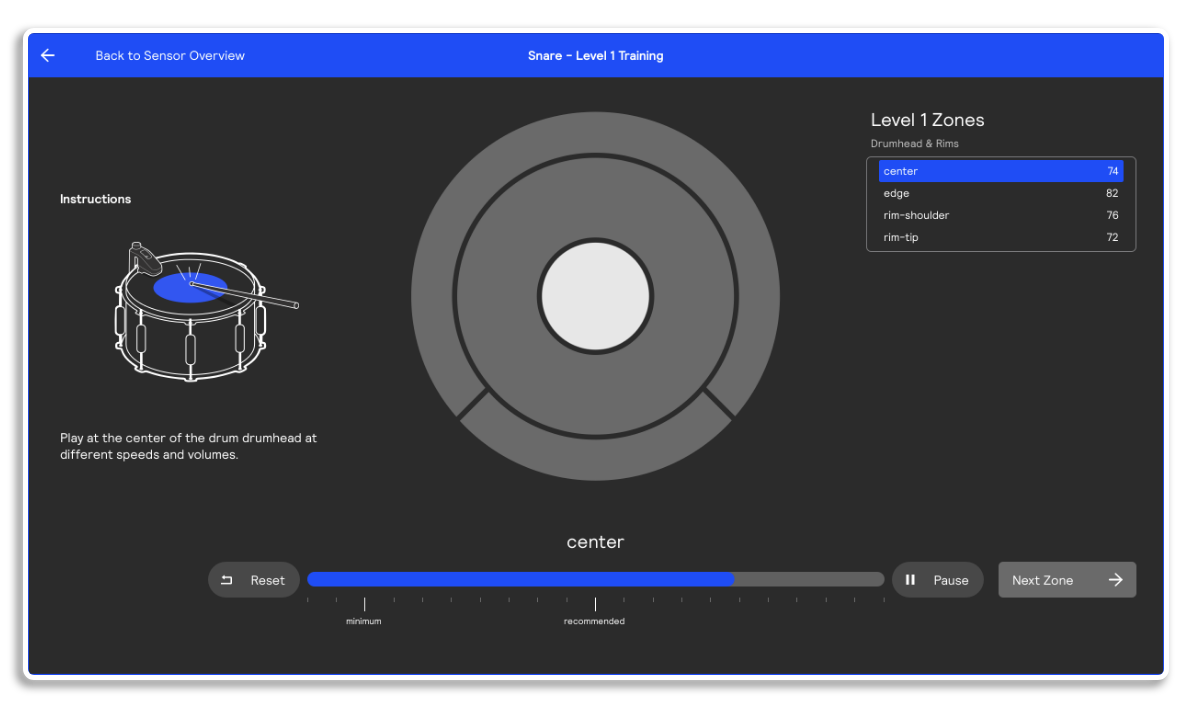
Guided Training is split into 3 different levels for the snare and two for the kick, in order from most to least commonly used zones. Following the on-screen prompts to train each zone in this order is the recommended way to most accurately train your drum.
As you train a given zone, the blue progress bar on the bottom will fill up with each trained hit. Each zone has an indicated minimum and recommended number of hits to be accurately trained. If you make a mistake while training, you can hit the Reset button to delete your training. You can also hit the Pause button to stop training and test how it sounds before moving on to the next zone.
Drum Zones by Level
- Snare Zones
- Kick Zones


Level 1: Drumhead & Rims
These are the most basic zones and drum gestures that are required for the software to correctly recognize your playing:
- Center: hitting the drumhead in the center
- Edge: hitting the drumhead on the outer perimeter
- Rim-shoulder: hitting the rim with the shoulder of the stick
- Rim-tip: hitting the rim with the tip of the stick
Level 2: Sticks
The second level includes more advanced, but common, drumming gestures. These zones are optional. They include:
- Rimshot-center: a rimshot hitting the center of the drumhead
- Rimshot-edge: a rimshot hitting the outer perimeter of the drumhead
- Cross-stick: digging one end of the stick in the head while hitting the rim with the other.
Level 3: Advanced
Level 3 includes less common drumming gestures and are also optional. Unless you plan on actively using these gestures in your playing, we recommend leaving these zones untrained to improve overall accuracy.
- Damped: playing the drum head while dampening it with the other hand
- Stickshot: digging one stick into the head and hitting it with the other
- Shell: hitting the side of the drum


Level 1: Basics
These are the most basic drum gestures for the kick and are required for the software to correctly recognize your playing:
- Open: mallet rebound off of the drumhead
- Closed: digging the mallet into the head
- Rim shoulder: hitting the hoop edge with the shoulder of the stick
- Rim Tip: hitting the hoop edge with the tip of the stick
Level 2: Extras
These zones are less common and are optional:
- Shell: hitting the kick drum above the hoop
- Hardware: hitting the drum hardware with your stick
Manual Training
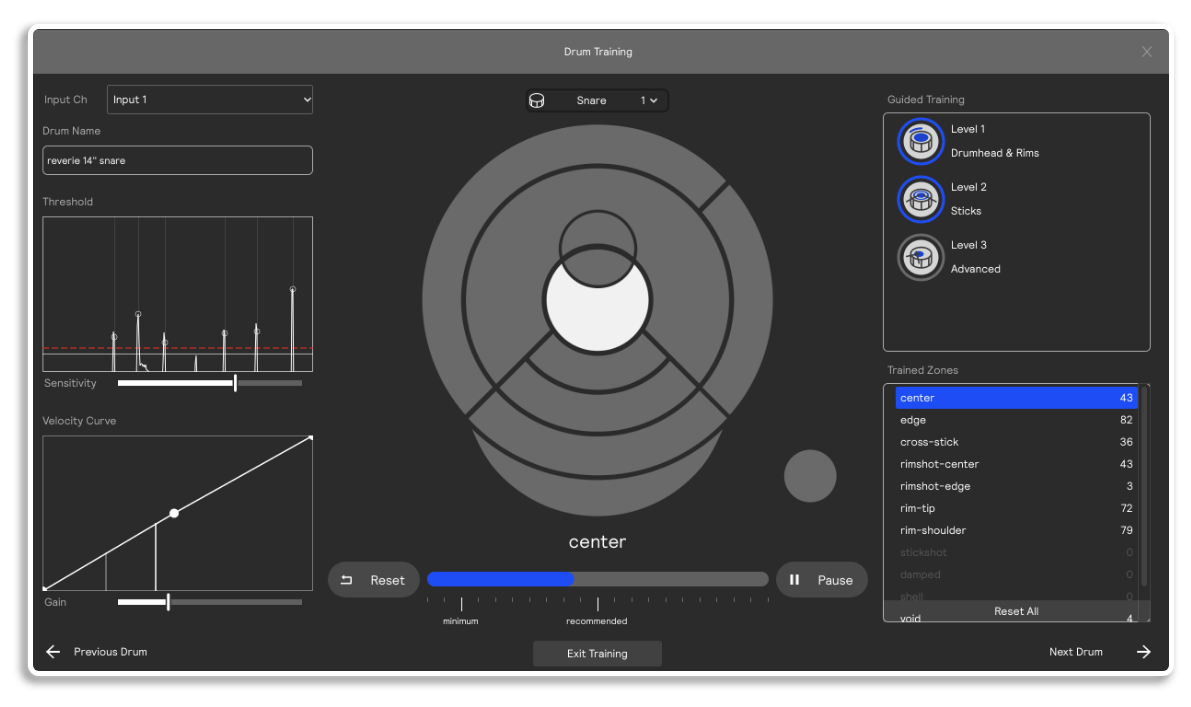
Unlike Guided Training, Manual Training allows you to train zones in whatever order you like. Just click Manual Training and select the zone you'd like to train, regardless of which of level it belongs to. Untrained zones will appear greyed out, while trained zones will be appear white.
Void
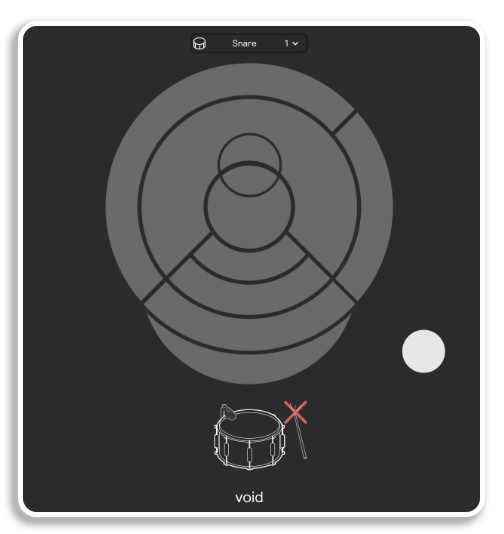
The Void zone is a bit different from the other zones in that it's not a physical part of the drum. Because of this, it doesn't belong to any of the 3 Levels listed above, and only exists in Manual Training.
Void allows you to tell Sensory Percussion what to ignore. This is useful for dealing with unwanted cross-talk from a cymbal that's close to a sensor, for example. Select the Void zone and hit the cymbal to teach the software ignore it. But be careful not to overtrain the Void zone; a little goes a long way, and using it too much will result in reduced sensitivity on the other zones you have trained.
Velocity Threshold


The Velocity Threshold panel shows you the velocity of incoming hits. The red line represents the threshold; any hits that come in under this red line will not trigger any sounds inside the software. You can raise this line to ignore softer hits, or lower it to include them. Generally, you want to set the threshold as low as possible, while still filtering out any unwanted noise.
Velocity In/Out


The Velocity In/Out panel allows you to adjust both the incoming and outgoing velocity of a sensor input, with incoming velocity on the x-axis and outgoing on the y-axis. By default, there is a direct relationship between the two, as in the example above with a straight line going from the bottom-left to the top-right corner.
Dragging the bottom-left node to the right will increase the minimum incoming velocity, and dragging it upwards will increase the minimum outgoing velocity. The maximum in/out velocities can be adjusted in the same way by dragging the top-right node.
Check out the How To Use Thresholding page for some creative applications for both threshold and velocity i/o panels.
Sensitivity
Sensitivity adjusts the software’s response to quick hits like buzz rolls. Since kick drums, for example, are not registering as many hits in quick succession, they can have lower sensitivity. If you have a very loose drum head and the sensor is registering more than one hit each time you strike the drum, decreasing the sensitivity will help.
Gain
This bar allows you to increase or decrease the outgoing velocity level of hits on a given drum without affecting the maximum/minimum values. If you're getting low signal across all the zones of a particular drum, you can increase the gain to match it to the level of your other drums.