Assignments and Modulators
Assignments are a great way to add expressivity to your sounds. Assigning an aspect of your playing to control a knob, button, or slider within your set allows the sounds to really respond to the nuances of your playing. Create different combinations of assignments to make your set respond to how hard, how fast, and where you play--all in real-time and with fine-tuned control!
When using an assigment or modulator, there are three main things to consider:
1. Destination: What parameter do you want to control? Examples: reverb dry/wet, panning left/right, mute button on/off, transpose up/down, sample attack time
2. Source: What drum/device/input do you want to control it with? Examples: zone of snare drum, button of a MIDI controller, macro knob
3. Type: How do you want to control it? Examples: speed, velocity, external MIDI CC, LFO modulation
Assignments and modulators both allow you to change any of these three things at any point. The main difference is that assignments allow you start with the assignment's destination parameter (#1), while modulators allow you to start with the mode of control (#3). Which one you choose depends on your preferred workflow. To understand the difference, let's look at an example of each:
Assignments
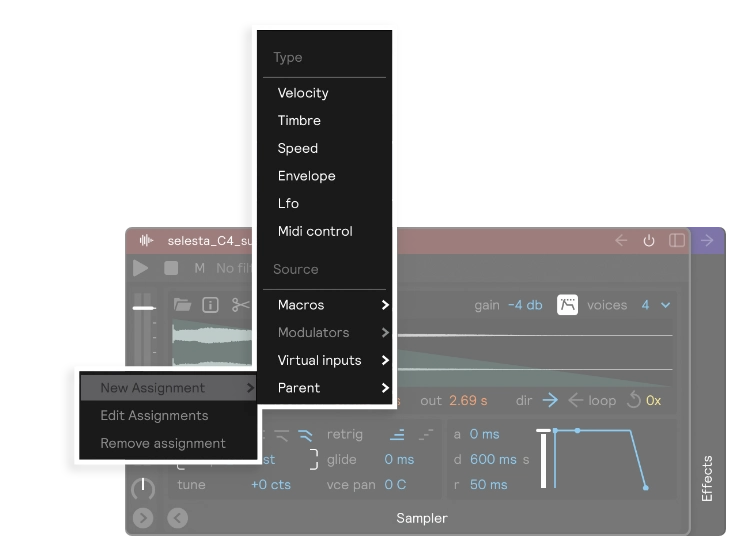
The process of making an assignment starts with the parameter receiving the assignment. Right-click on the parameter in your set that you want to control and select New Assignment. In the example above, the sampler's 'transpose' parameter will be the destination of the assignment.
Once you've chosen the destination, you can create an assignment based on the assignment's source or the assignment's type from this right-click menu.
Source: Selects the input that controls the assigned parameter.
Type: Selects how the input controls the assigned parameter.
Selecting any of the 'Type' options from this menu will create an assignment with its 'Type' set to that option (Velocity, Timbre, Speed, Envelope, LFO, MIDI Control) and its its Source set to ‘Default’.
Having a 'Default' source means that the assignment will inherit the input(s) from any input filters present on or above the assigned module in its respective layer. Set-level macros can receive assignments, but there is no 'Default' source option on these assignments because input filters don't apply to them.
Selecting 'Default' as the source of an assignment on a module will allow you to move that module around to different layers without breaking the assignment links.
For this reason, 'Default' is the recommended assignment source, with one notable exception being Cross-Control. If you want a module's parameter to be controlled by a different input than the input that is triggering the module, you must select the source input directly.
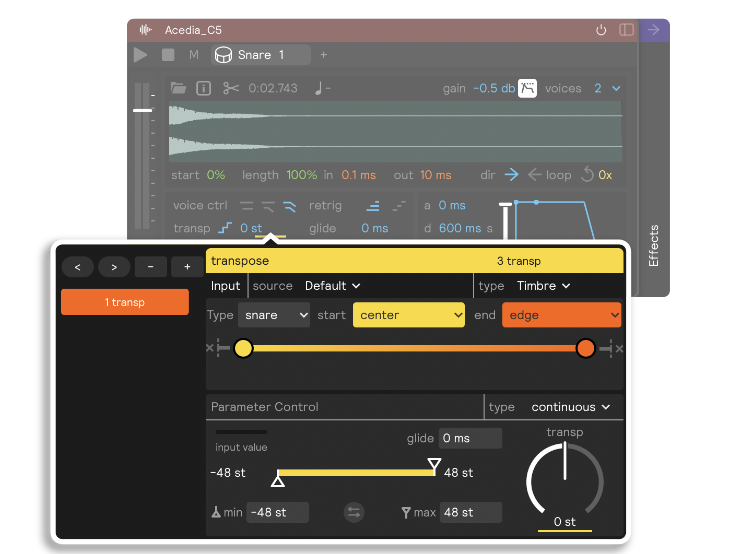
The screenshot above shows the result of choosing 'Timbre' from the quick create options. With this assignment, you can transpose the pitch of the sampler up/down by playing from center to edge on snare 1.
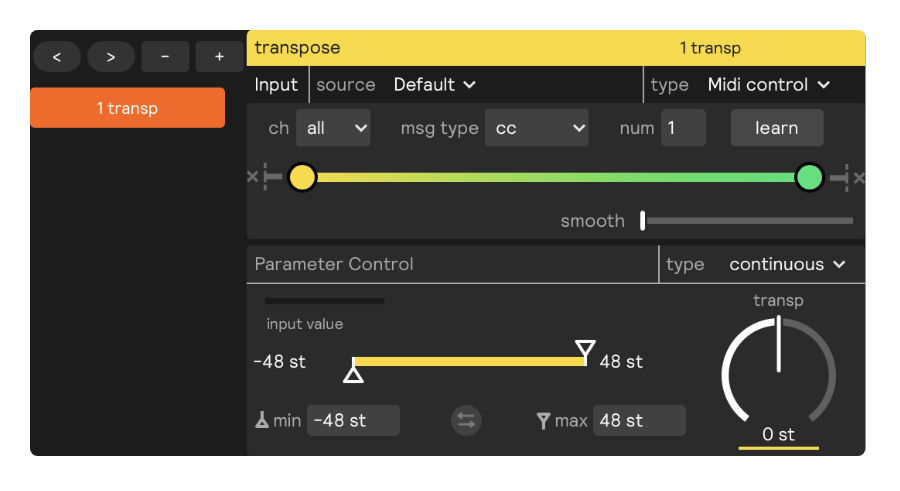
In addition to Source and Type, the assignment window allows you to adjust the sensitivity, parameter control range, parameter control type (continuous, momentary, toggle, target), and glide amount (the amount of time it takes to move from one output value to the next).
Modulators
Modulators work the same way as assignments, but while assignments start from the recipient of the assignment before choosing the mode of control, modulators start from the mode of control before choosing what will receive the modulation.
To access the Modulator panel of a module, click the panel icon in the top right corner of the module. From the dropdown, select "Modulators" to view the Modulator panel. Click the + button in the bottom right of the Modulator panel to add a modulator.
Once you've created your modulator, you need to grab its handle and drag it onto the parameter you want it to control:
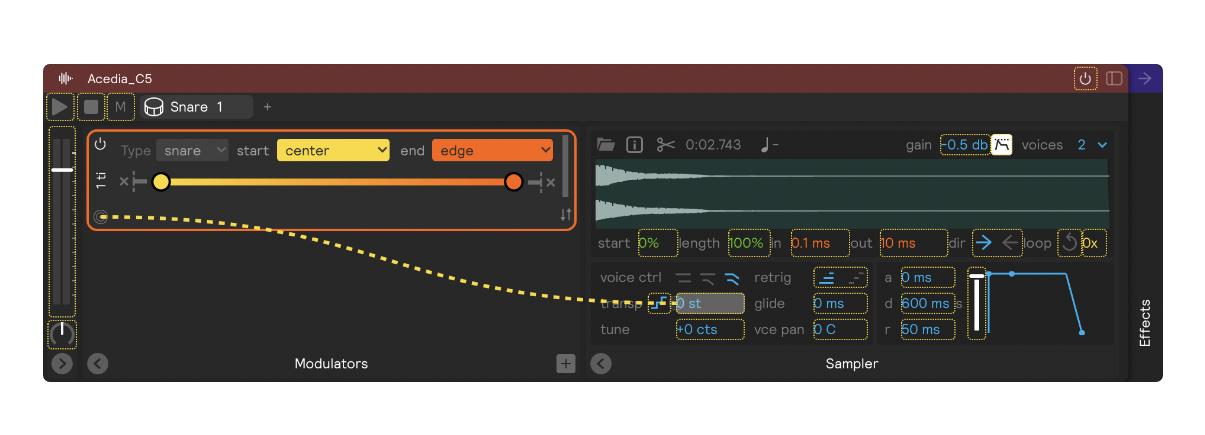
The example above shows a timbre modulator being dragged onto the transpose parameter of a sampler. This will result in the same assignment as the previous example: timbre from center to edge on snare 1 transposing the sample up/down.
It's often preferable to use a drag-and-drop modulator rather than a right-click assignment if you plan to use that same modulator type/source to control multiple destination parameters. In that case, rather than making identical assignments on each destination parameter, you can drag the same modulator onto each one. Then, any changes you make to that modulator will be applied to all of its destination parameters.
Sensory Percussion 2 lets you create just about anything with almost no restrictions on where you can drag-and-drop modulators and macros to create assignments. You can, for example, drag a across layers to any depth. Or create a circular assignment chain of modulators -- please don't do this, it's generally a bad idea.
Keep in mind that if you use a lot of cross-control elements, it might be hard to reuse these elements in other sets as copy-pasting them into another set will break the assignment links. You can avoid this by generating a group from the cross-controlled layers to encapsulate them in a single layer.
Assignment/Modulator Types
Velocity
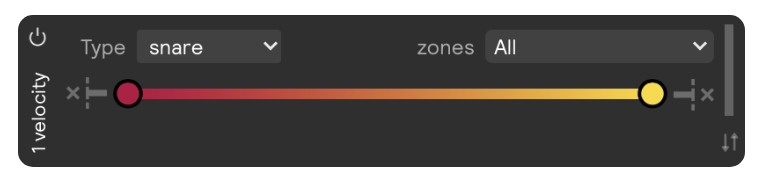
Sets a range between soft and hard. For example, if you assign velocity to filter cutoff without adjusting the range, quiet hits will set the filter cutoff close to 20 Hz, while loud hits will open the cutoff to around 20,000 Hz.
Timbre
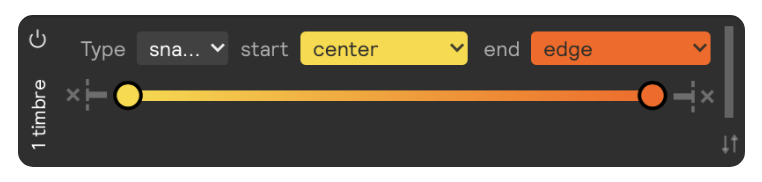
Sets a range between two timbral zones, for example: center and edge. You could right-click on a Reverb mix knob, select New Assignment, and select timbre: center to edge. Now hits in the center will send the mix knob close to 0 (no reverb) and hits on the edge will send the mix knob to close to 100.
Speed
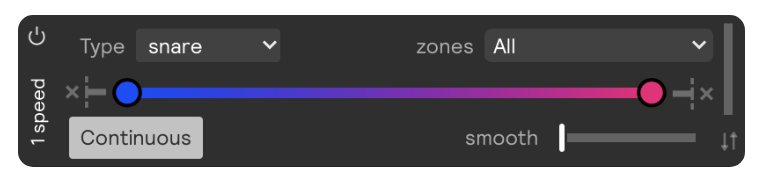
Sets a range between slow and fast. Playing fast (like buzz rolls) will set the parameter to its top value. As with all assignments you can adjust the sensitivity: maybe you want the parameter to be at its low value at medium fast playing, and move to its top level with brisk 16th notes, in that case you would drag both sides of the sensitivity range inwards.
Pedal
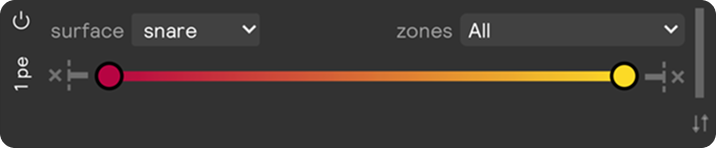
This is a hi-hat-specific modulator type that uses the pressure values from the your hi-hat sensor to modulate any parameter. This can be super fun when assigned to pitch control of the entire set, or to crazy effects chains. It’s a great way to get your left foot involved in the modulation fun of Sensory Percussion!
Envelope

Sends a shape (attack, decay, sustain, release) to a parameter range. And because Sensory Percussion is a drumming system (in most cases you won't be interfacing with envelopes using a piano keyboard) there are the additional parameters of* start*, peak, hold, end, and use velocity which simulates the pressing and holding of a key.
LFO (Low Frequency Oscillator)
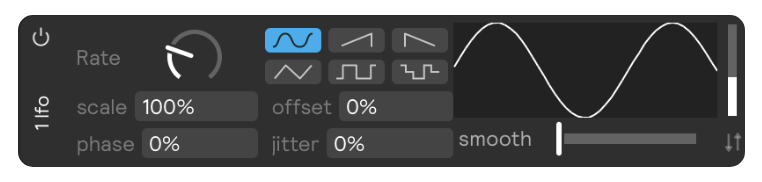
Sends an automated wave pattern to a parameter range. This is a nice way to control a parameter without actually playing a drum. Available shapes are sine, triangle, sawtooth up, sawtooth down, square, and random. You can scale the shape, add smoothing, adjust the phase, change the rate (0.01 Hz - 40,000 Hz), and add jitter.
Random | Step


Upon receiving a hit message, rand | step sends incremented or randomized steps to what it is assigned to. In steps mode, it will evenly divide the parameter range into the number of steps you have selected. If you add 100 steps to the modulator, it will increment what ever knob it is assigned to in this order: .01, .02, .03, etc. In rand mode, it will simply send a a randomized step within the min max boundary you have set.
In steps mode, the direction control allows you to set whether the steps increment forwards and reset to the lowest value after the top is reached, or if it stairsteps down in reverse. If you simply want the steps to start at the top and decrement, choose the forward direction, but invert the range by slecting the up/down arrow icon in the bottom right of the icon.
Remainder is an interesting parameter that enables beautiful patterns to emerge if it is in carry over mode and you have input a decimal point value into steps. For example, if you have the rand | step modulator assigned to a macro knob, and 2.06 set for steps, and Remainder left in its default ignore remainder position, then when the modulator receives hit messages, the macro knob will increment between just three values: 0, .49, and 0.97. But, if you set the remainder parameter to carry over, then it will create a more interesting, much longer pattern that begins like this: 0, .49, .97, .46, .94, .43, .91, .40, .88, .37, and so on.
MIDI
To add a MIDI assignment, first make sure you have enabled your MIDI device in Sensory Percussion audio settings, and added a Hardware MIDI input.
Make sure you have a MIDI virtual input added to your set.
Now right-click on a parameter and select that virtual input as the assignment input. Select "learn" in the top right hand corner and press a button or key on your MIDI device. Now that button/key is the input to the assignment.
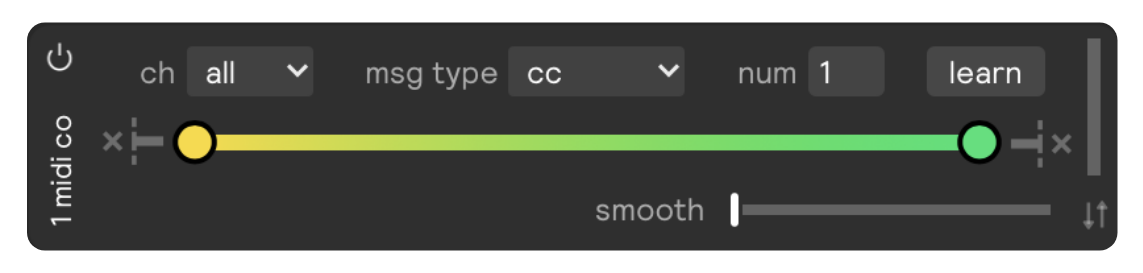
If you want a knob or fader to control a parameter, select a MIDI Control as the assignment/modulator input. Select "learn" and wiggle a knob to set the assignment input.
This "learn" button exists in the MIDI control assignment window as well as the MIDI control modulator: