How To Add Assignments
Assignments are, perhaps, the most powerful feature of Sensory Percussion. They allow you control pretty much any parameter with whatever gesture you want: velocity, timbre, speed, envelope, LFOs, or MIDI. And you can use assignment ranges that are either very extreme, or extremely finely detailed: whatever your imagination desires!
There are a few methods of creating assignments and some best practices in keeping everything organized. Read below for how to create and organize assignments.
Right-click
A common method for adding assignments is the right-click method: right-click on the parameter you want to control and select New Assignment, and then navigate to the type of assignment you want to create.
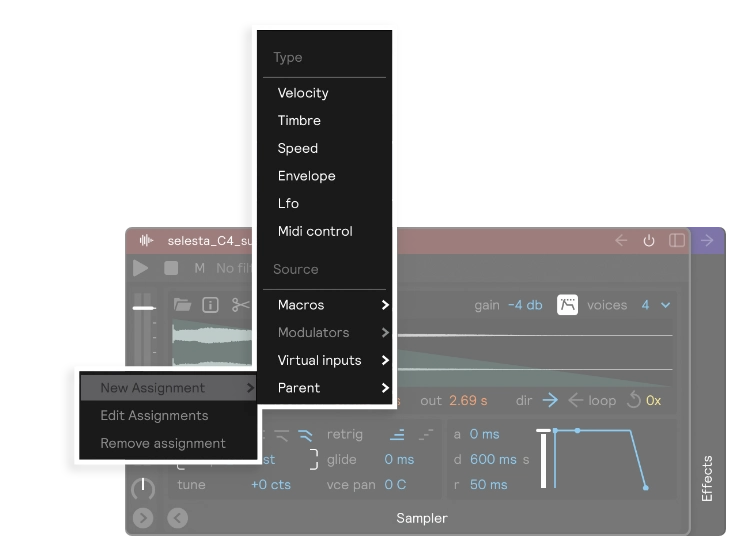
When you create an assignment it will be controlled by the module's input filter, which makes sense because you wouldn't want the assignment to have a different input source by defualt. But if you do want one drum to control another, then check out the How To article on Cross Control.
This method is great if you just want to create one specific assignment on one specific parameter, and don't necessarily want to reuse the same assignment ranges on another parameter and don't particularly care about seeing this assignment prominantly on the edit page.
But, if you are wanting to repeat the same assignment type across multiple parameters, then this method can be a bit tedious.
Check out the following section for another method better suited for using the same assignment settings across multiple parameters.
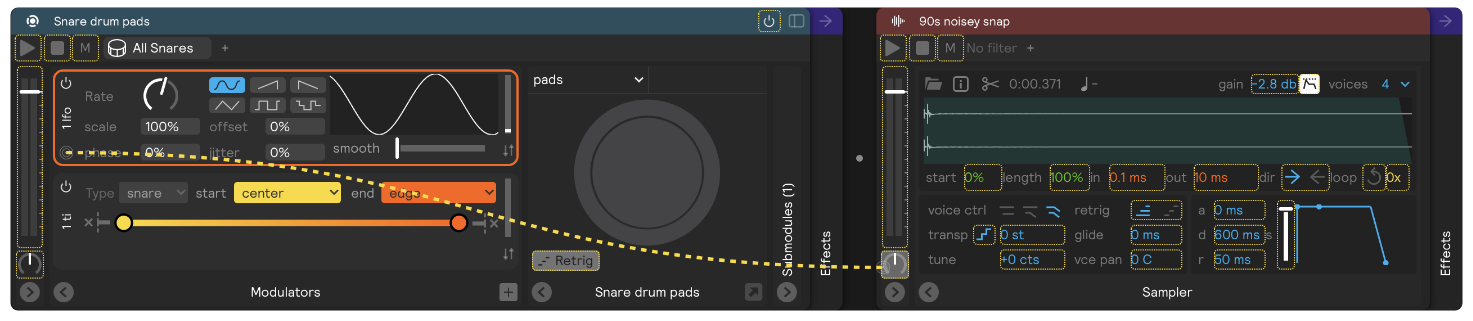
Drag-and-drop
There are two types of objects that can be dragged/dropped to create assignments: Modulators and Macros. Drag these onto almost any parameter in the software to control that parameter with the input of your choice, whether it's the knob of a MIDI controller, the speed of your playing, or a random LFO.
Modulators
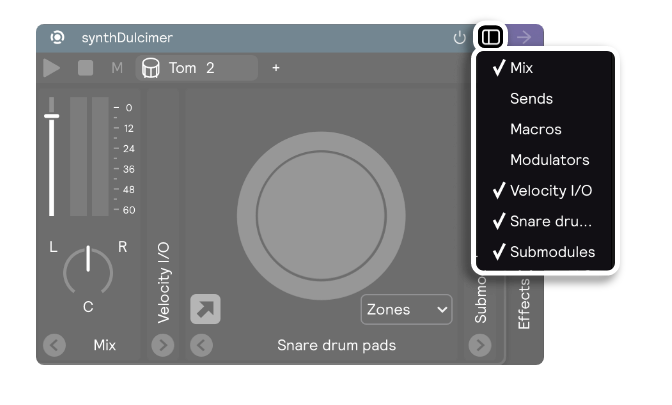
To create a modulator, first make sure the modulators panel is visible by selecting the panels dropdown in the top right corner:
Then select the "+" button to add a modulator (Velocity, Timbre, Speed, Envelope, LFO, MIDI Control). You can drag/drop it onto parameters to create assignments. You can also access modulators by right-clicking the destination parameter and selecting "Modulators" from the dropdown. Any modulators that you've created on that layer will be listed here.
Macros
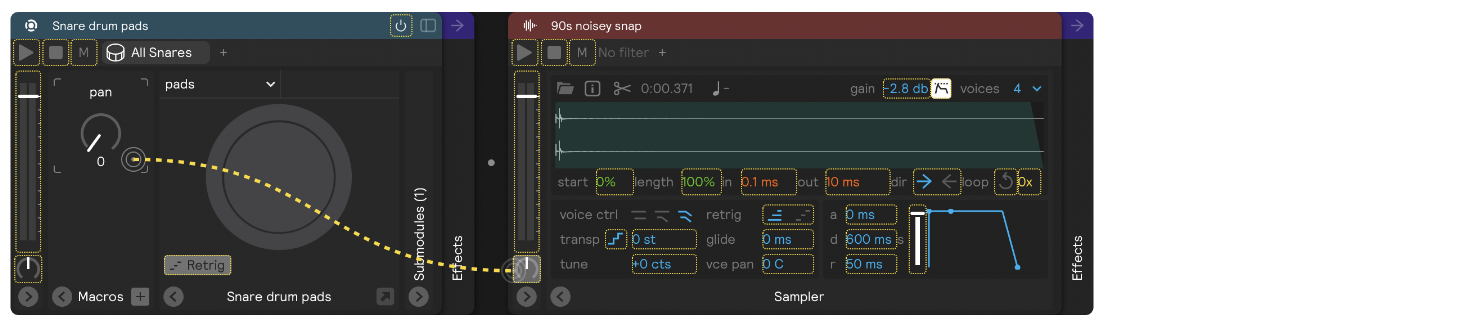
Macros can also be dragged and dropped to multiple parameters. Show the macros panel in the same way you show the modulator panel (select the panels dropdown in the module's top right corner and check "macros.")
Click the "+" button to add a macro: you can rename it by double clicking the title and typing. You can then drag and drop that macro to as many parameters on as many modules in the layer that you like. If you want to use Velocity, Timbre, Speed, Envelope, or MIDI Control to control the macro, then you can right-click it and select one of those options in the assignment dropdown.