How To Use the Ableton Live Plugin
The Sensory Percussion 2 Ableton Plugin has all of the features of the standalone app, but it runs inside Ableton Live 11.3+. It will load inside other DAWs that support VSTs, but full usage of all seven sensor inputs is restricted by the DAW's ability to route multi-channel audio into VST effects. In our tests, Ableton is the only DAW that supports this. That being said, it might be possible to use the plugin in other DAWs with a limited number of inputs.
Install the Sensory Percussion 2 VST3 Plugin
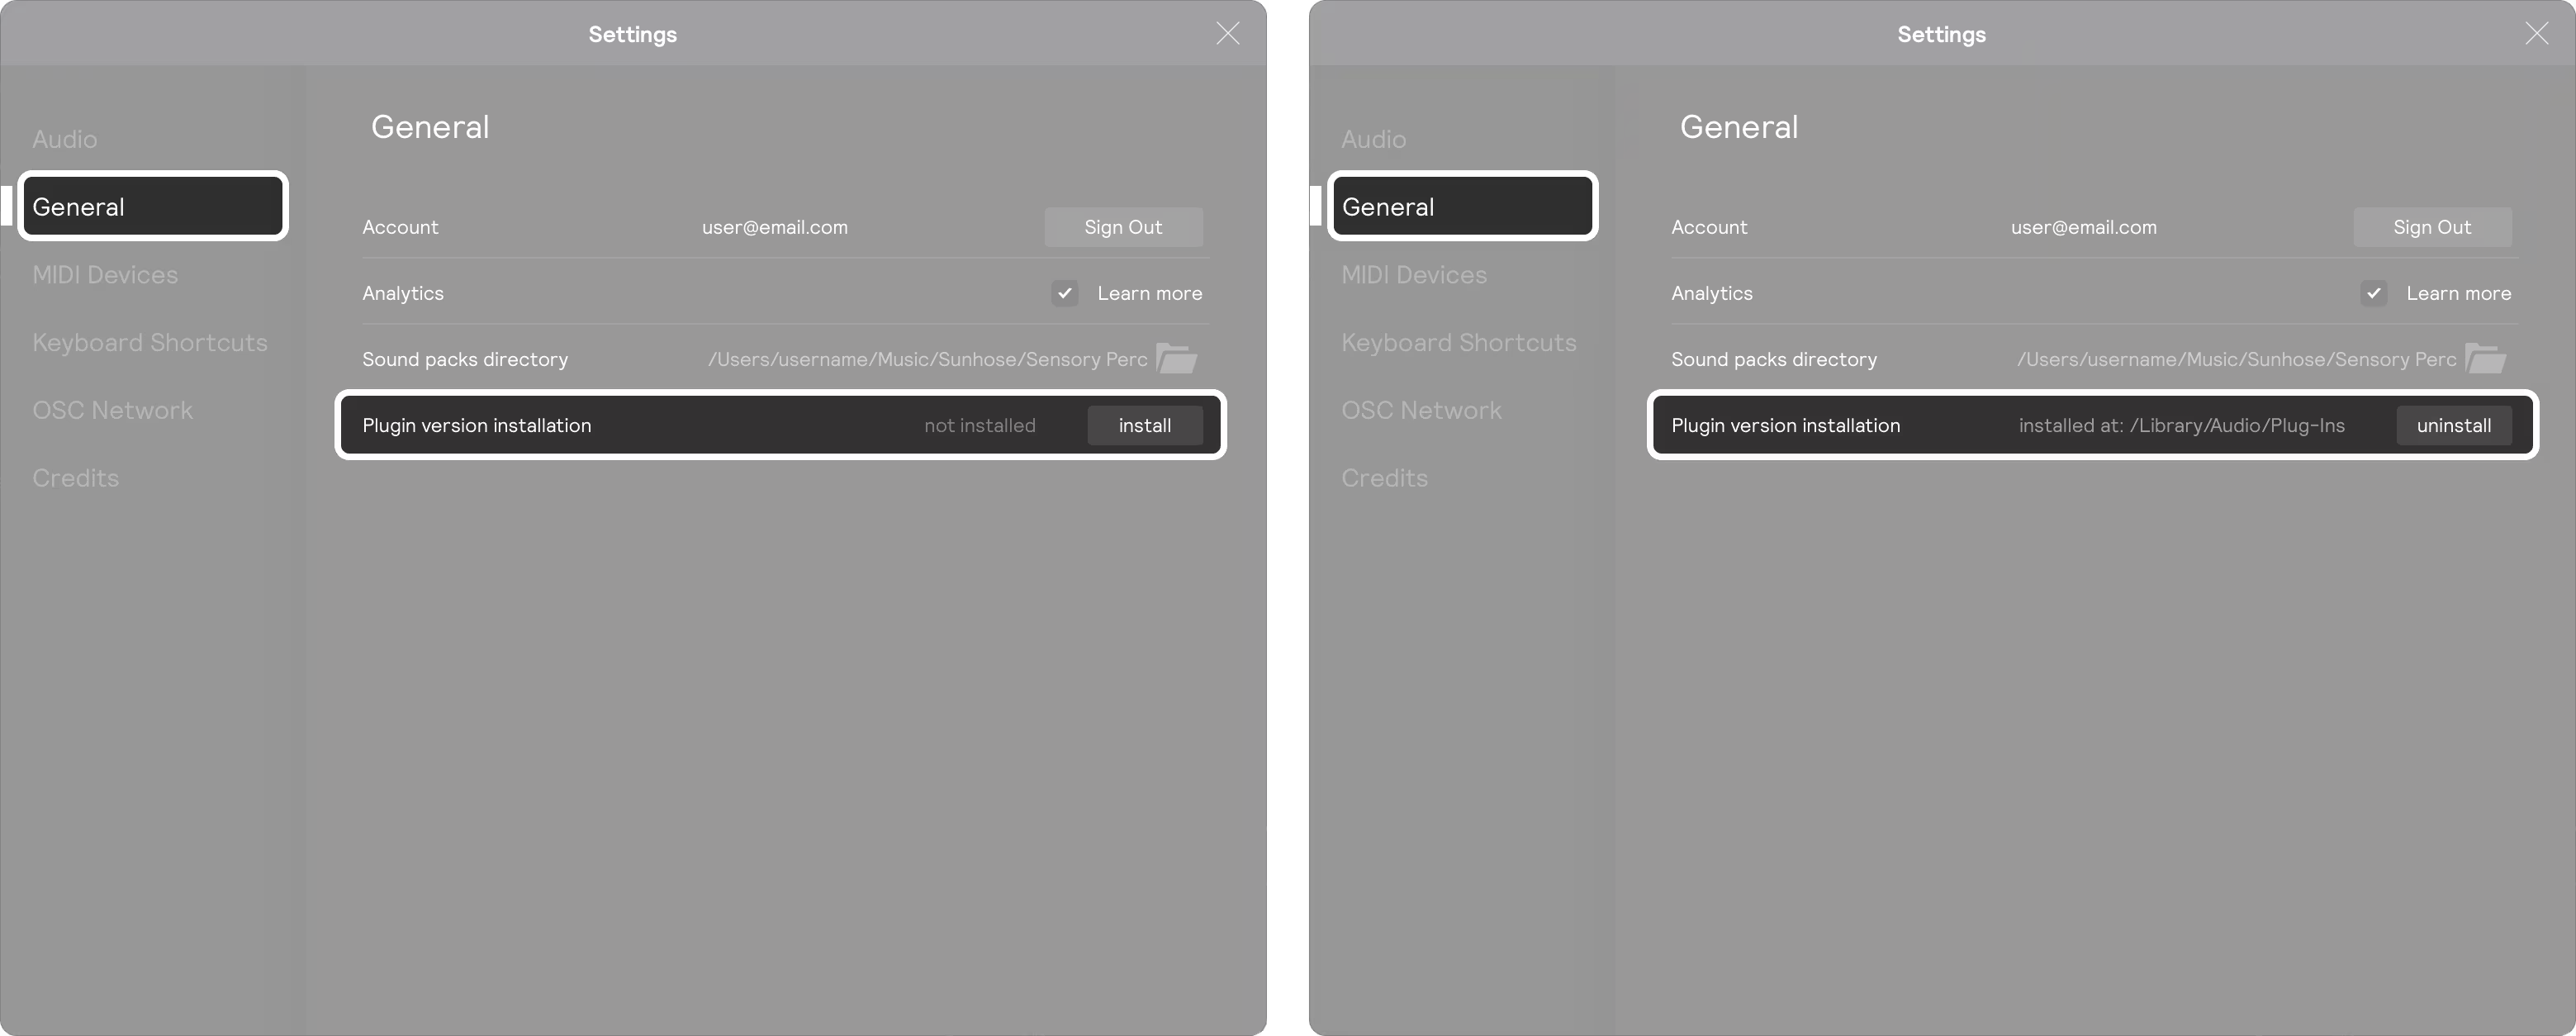
You can install the VST3 plugin by opening the Settings menu in the standalone app and clicking install button in the "General" tab. You'll be asked to enter your password because the default plug-in location is a system folder.
You can find the plugin in the VST3 folder of your system. The default location for VSTs on Windows is C:\Program Files\Common Files\VST3 and on Mac it is /Library/Audio/Plug-Ins/VST.
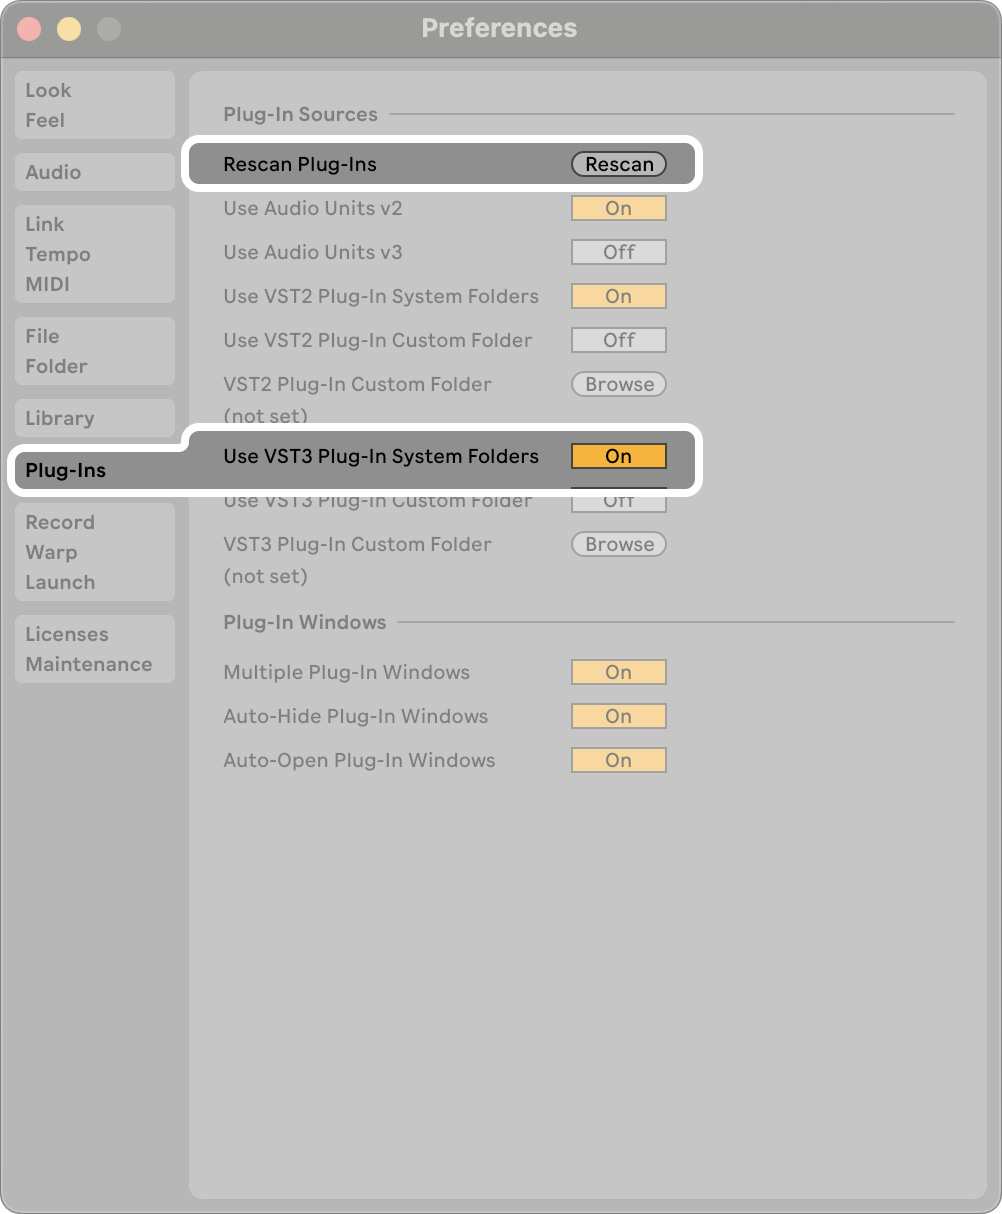
If you don't see the plugin in Ableton, you may need to rescan your plugins in the preferences menu.
How to rescan plugins
Click the "Rescan" button in the "Plug-ins" section of the Preferences window.
Download the Ableton Template
The Ableton template includes all the routing and channels you need to get started with Sensory Percussion in Ableton. It's the fastest way to get started with the plugin. If you have any suggestions on ways to improve the template, please let us know!
If you are using the Sensory Percussion 2 Beta Plugin, you can download the beta template from the Beta Downloads Page
How it works
Double-click the Sensory Percussion 2 Plugin Template.als file to open it in Ableton. Then click File > Save Live Set As Template to save it to your Templates folder in the library.
Then, whenever you want to create a new session, you can double-click the template in the Library to create a new Untitled session.
Ableton Live (unlike most other DAWs) allows you to route up to six stereo channels of audio into VST effects. These are called In Bus A through H. Because Sensory Percussion 2 inputs are mono, we are able to get up to 12 inputs into the plugin by panning the stereo inputs to the left and right channels of the In Buses.
The template takes a bit of a kitchen sink approach and includes all of the In Buses (7 sensor inputs & 5 analog inputs), even though you most likely will not need them all. Feel free to delete the ones you don't need and adapt the template to your needs.
1. Select your interface as the I/O for Ableton:
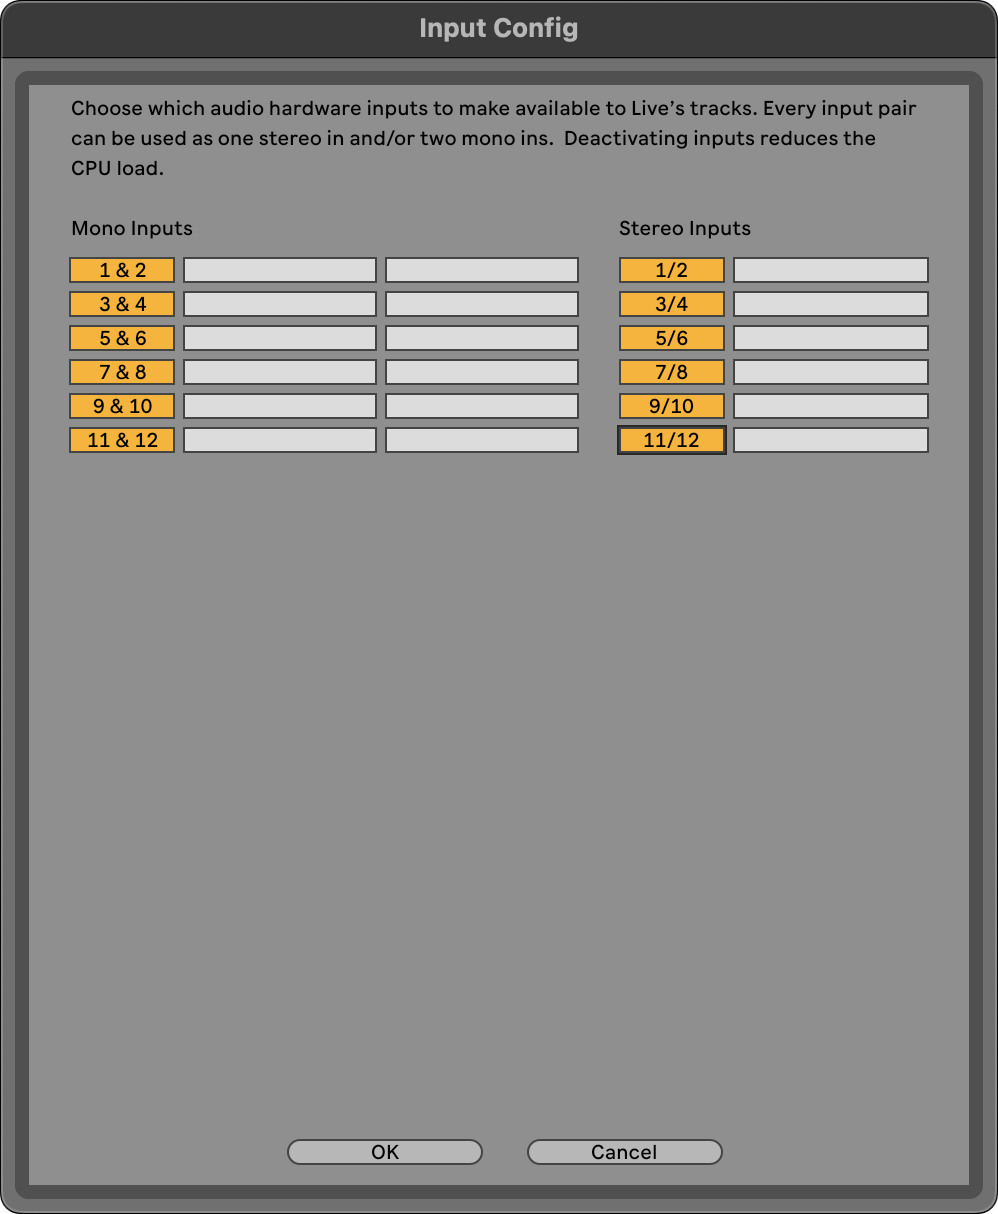
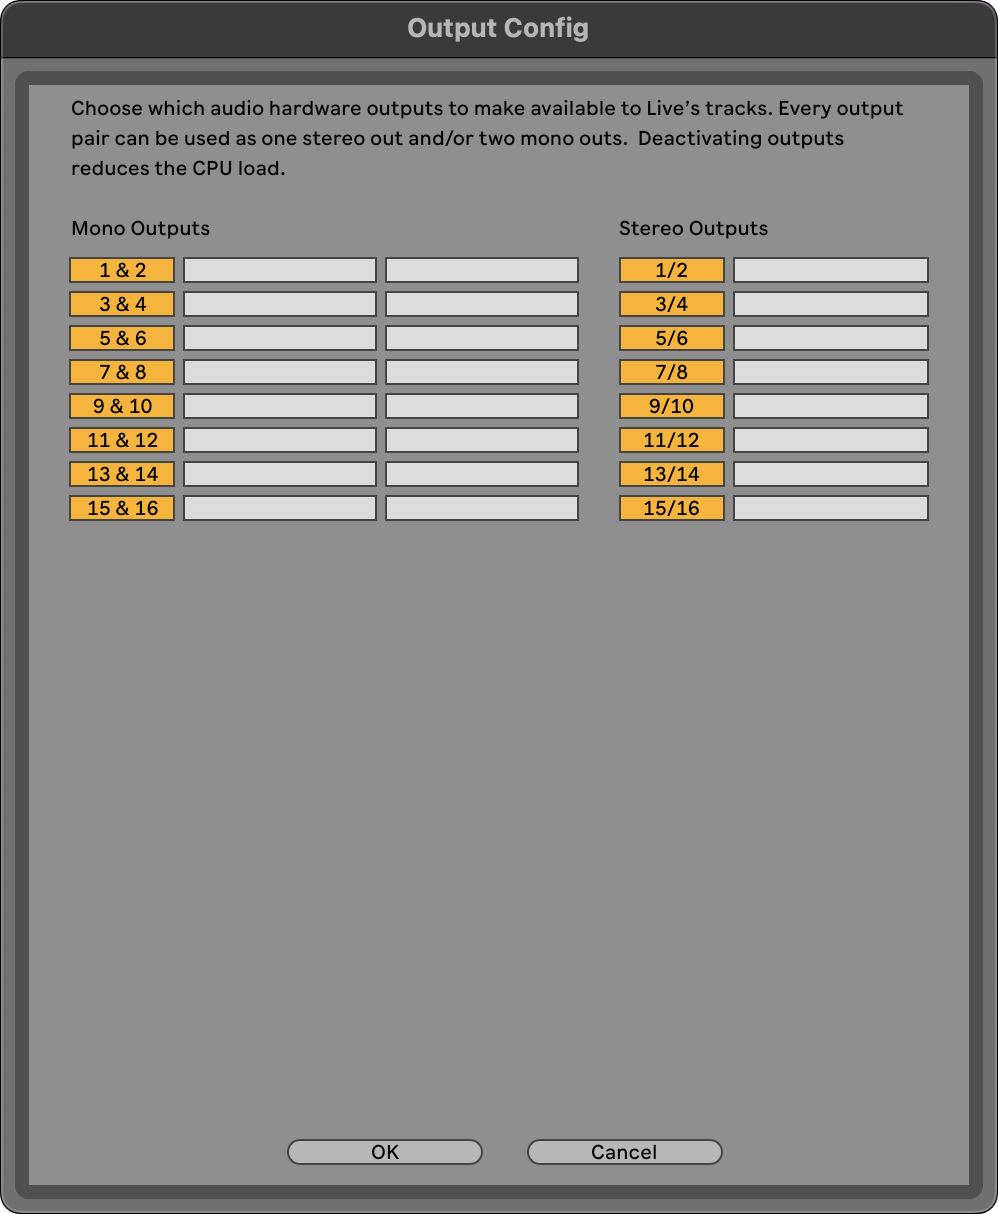
2. Enable your Inputs and Outputs
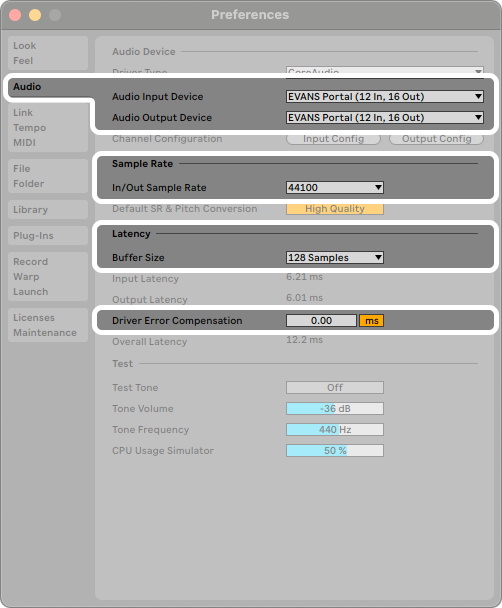
The first time you use your Portal interface with Ableton, you'll need to enable the inputs and outputs in the Audio Preferences.

You'll want to enable all the mono and stereo inputs and outputs that you plan to use.
3. Open the Sensory Percussion 2 Plugin
Click the track called Sensory Percussion 2 VST, then click the wrench icon to in the device title bar to open the plugin window.
4. Add your input devices
The template does not include any input devices by default since we won't know your drum types. You will need to add your input devices to the session.
If you have already setup and trained your drum inputs in the standalone app, you can export them to load them in the plugin. Open the standalone app and click File > Save inputs as... to save them to your computer. Then in the plugin, click File > Load inputs to load them into the plugin.
Otherwise, you can add inputs in the hardware IO panel. See the Sensor Inputs page for more info.
5. Select the input channel for your Sensor inputs
Because of the way routing works with the plugin, the input channel names in the plugin are a bit different than in the standalone app. Use the table below to route your inputs to the plugin.
| Input Channel | PORTAL Name |
|---|---|
| In bus A-L | Sensor 1 |
| In bus A-R | Sensor 2 |
| In bus B-L | Sensor 3 |
| In bus B-R | Sensor 4 |
| In bus C-L | Sensor 5 |
| In bus C-R | Sensor 6 |
| In bus D-L | Sensor 7 |
| In bus E-L | Mic/Line A |
| In bus E-R | Mic/Line B |
| In bus F | Line-In C & D |
| In bus G | Onboard Mic |
6. Train your drum inputs
Just like in the standalone app, you'll need to train your drum inputs. Click the Train button on each input and follow the instructions.
(Note if you loaded your inputs from the standalone app, you won't need to train them again.)
7. Make some music
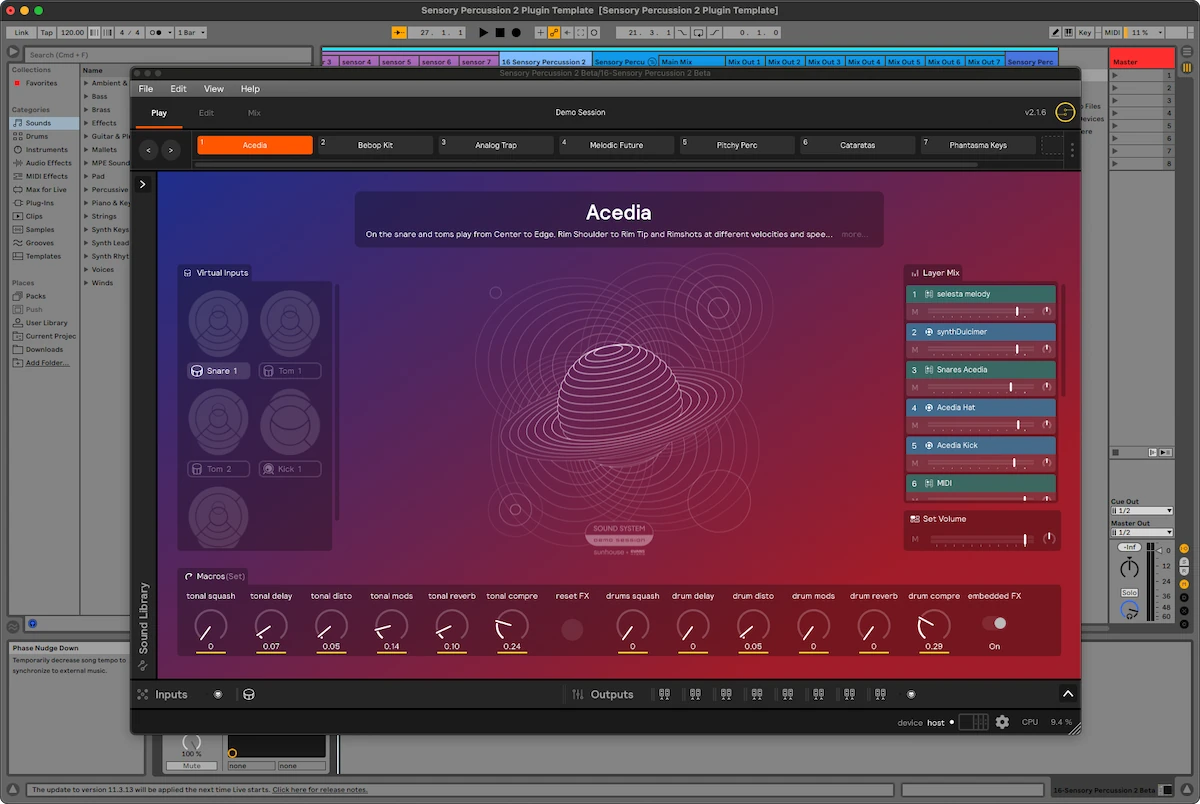
The template includes the Demo Set loaded by default. You can drag in other sets from the library or load another session from your computer.
9. Record
The template is setup to record the raw audio from the sensors and the Main Mix. You can record-enable other channels you might need in the session.
In the template we have muted the playback of Sensory Percussion audio tracks group:
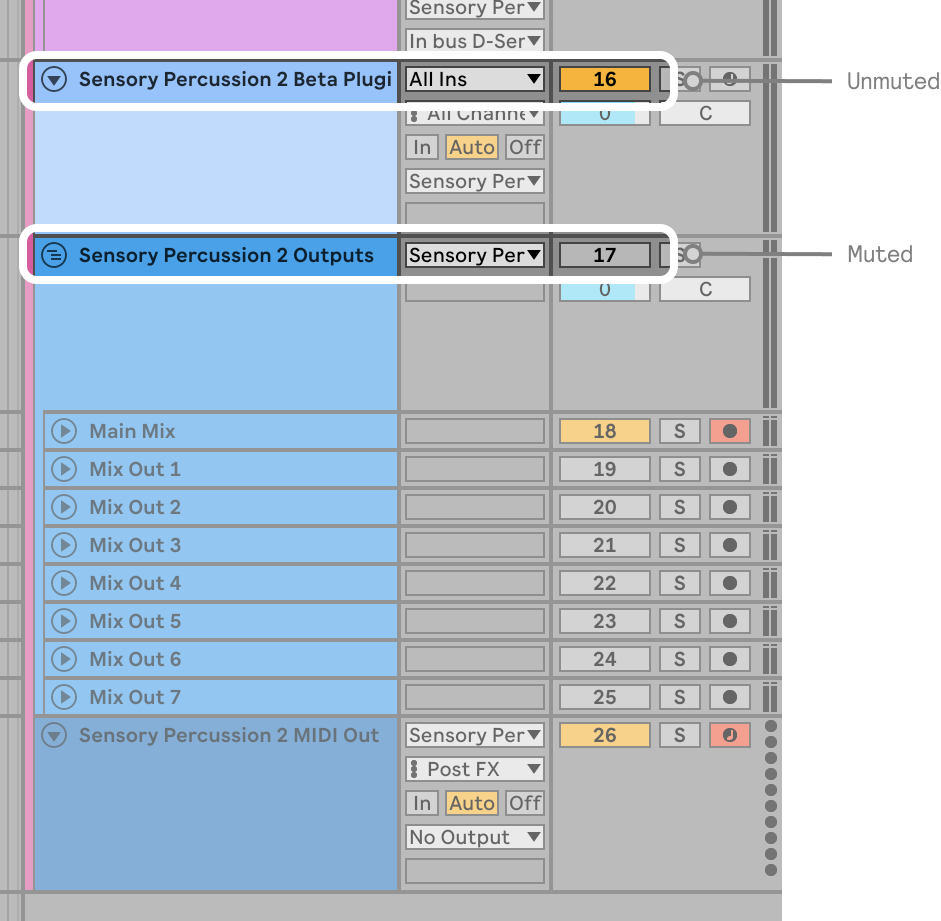
That is because we are monitoring playback through the Sensory Percussion 2 VST. If you want to listen to the recorded audio tracks, you can unmute the Sensory Percussion 2 audio tracks group, and mute the Sensory Percussion 2 VST.
MIDI
Getting MIDI into the Sensory Percussion 2 Ableton Plugin
Just like in the standalone app, you can use a MIDI controller to control almost any parameter inside the Sensory Percussion Ableton plugin. An external MIDI controller can be a helpful device to change kits, control macros, and advance sequencers, along with many other things.
Here's a step-by-step guide for getting Ableton to recognize your external MIDI controller and then routing into the Sensory Percussion 2 plugin:
1. Enable your MIDI device
In Ableton's MIDI preferences, select the MIDI device that you want to control Sensory Percussion with:
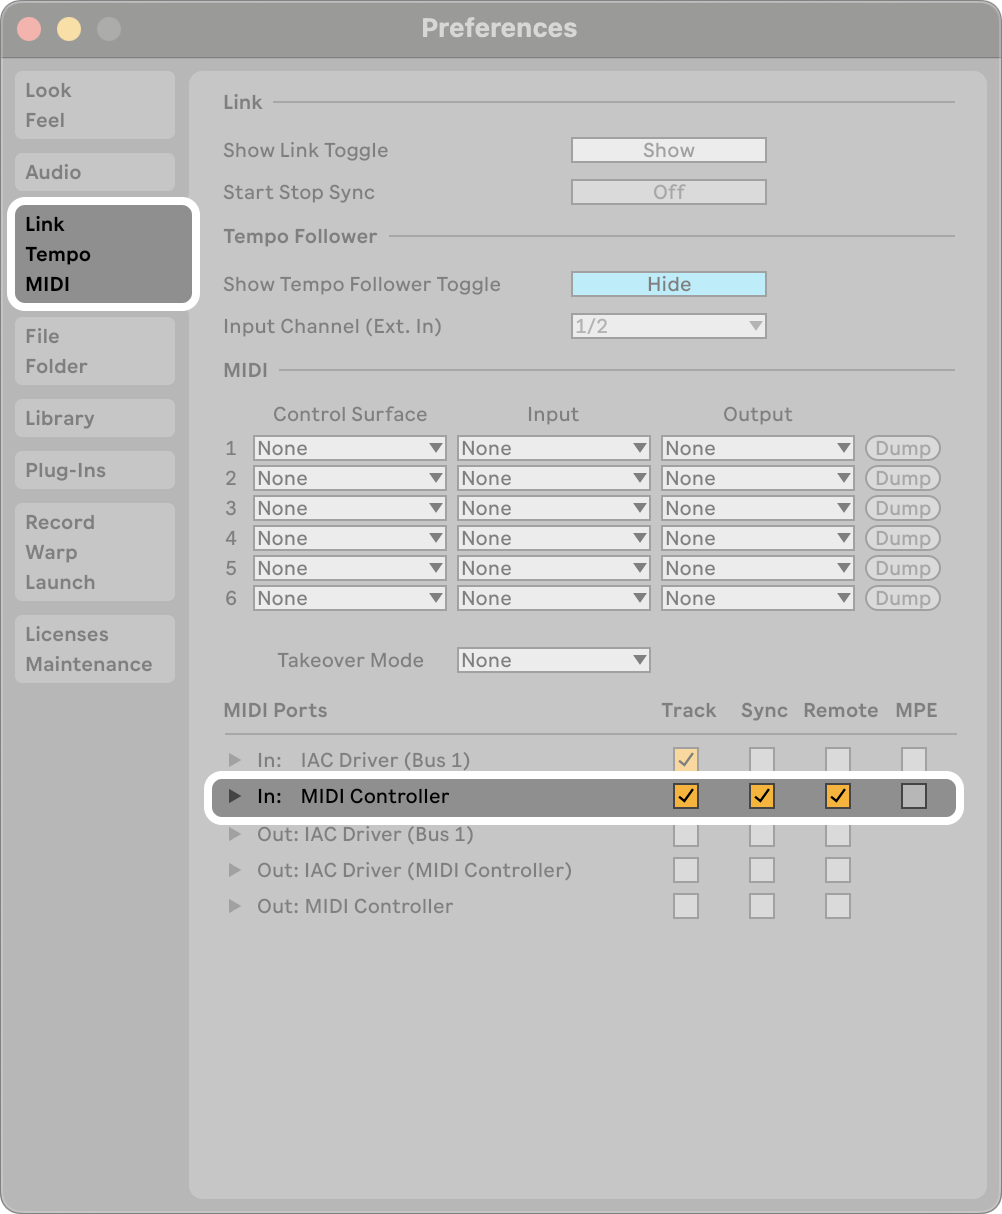
If you don't see your device in the preferences menu, you'll most likely have to install a driver for your MIDI device.
The template comes with a MIDI channel called Sensory Percussion 2 MIDI Inputs and a MIDI input inside the plugin already wired together. You can use this as a starting point to route your MIDI device into the Sensory Percussion 2 plugin.
Next, you'll need to select your MIDI external device as the input type for the MIDI channel.
Then open the Sensory Percussion 2 plugin window and use the preconfigured MIDI Input device to make assignments on parameters. You can read the page on how to use MIDI In to learn more about this process.
Routing MIDI out of the Sensory Percussion 2 Plugin
The template comes with a MIDI Input Channel in the Ableton session and a MIDI Output in the SPv2 Session already wired up. All you need to do is configure what notes and/or CC messages you want to send out of the plugin.
To do this, you'll need to add MIDI Notes Generator or MIDI CC Generator modules to a layer. You can learn more about this process on the How to Send MIDI Out page.
Then you can assign MIDI effects, Ableton Instruments, and VSTs to the MIDI channel and control it with notes from Sensory Percussion.
Ableton sums all of the MIDI data coming out of the Sensory Percussion Plugin into just one channel, i.e., if you trying to send MIDI out of Sensory Percussion on multiple MIDI channels, Ableton will force the data to be on just one channel.
Additionally, MIDI CC messages from the plugin cannot directly control elements of Ableton's UI. In order to control knobs, buttons, and faders in Ableton from the Sensory Percussion 2 plugin, you either have to:
-
Send MIDI from the Sensory Percussion 2 Plugin out of an external bus, and then route the MIDI back into Ableton.
-
Use a Max for Live device like Max Api CtrlMIDIcc.amxd (availble in this pack)