Sensory Percussion Ableton Plugin
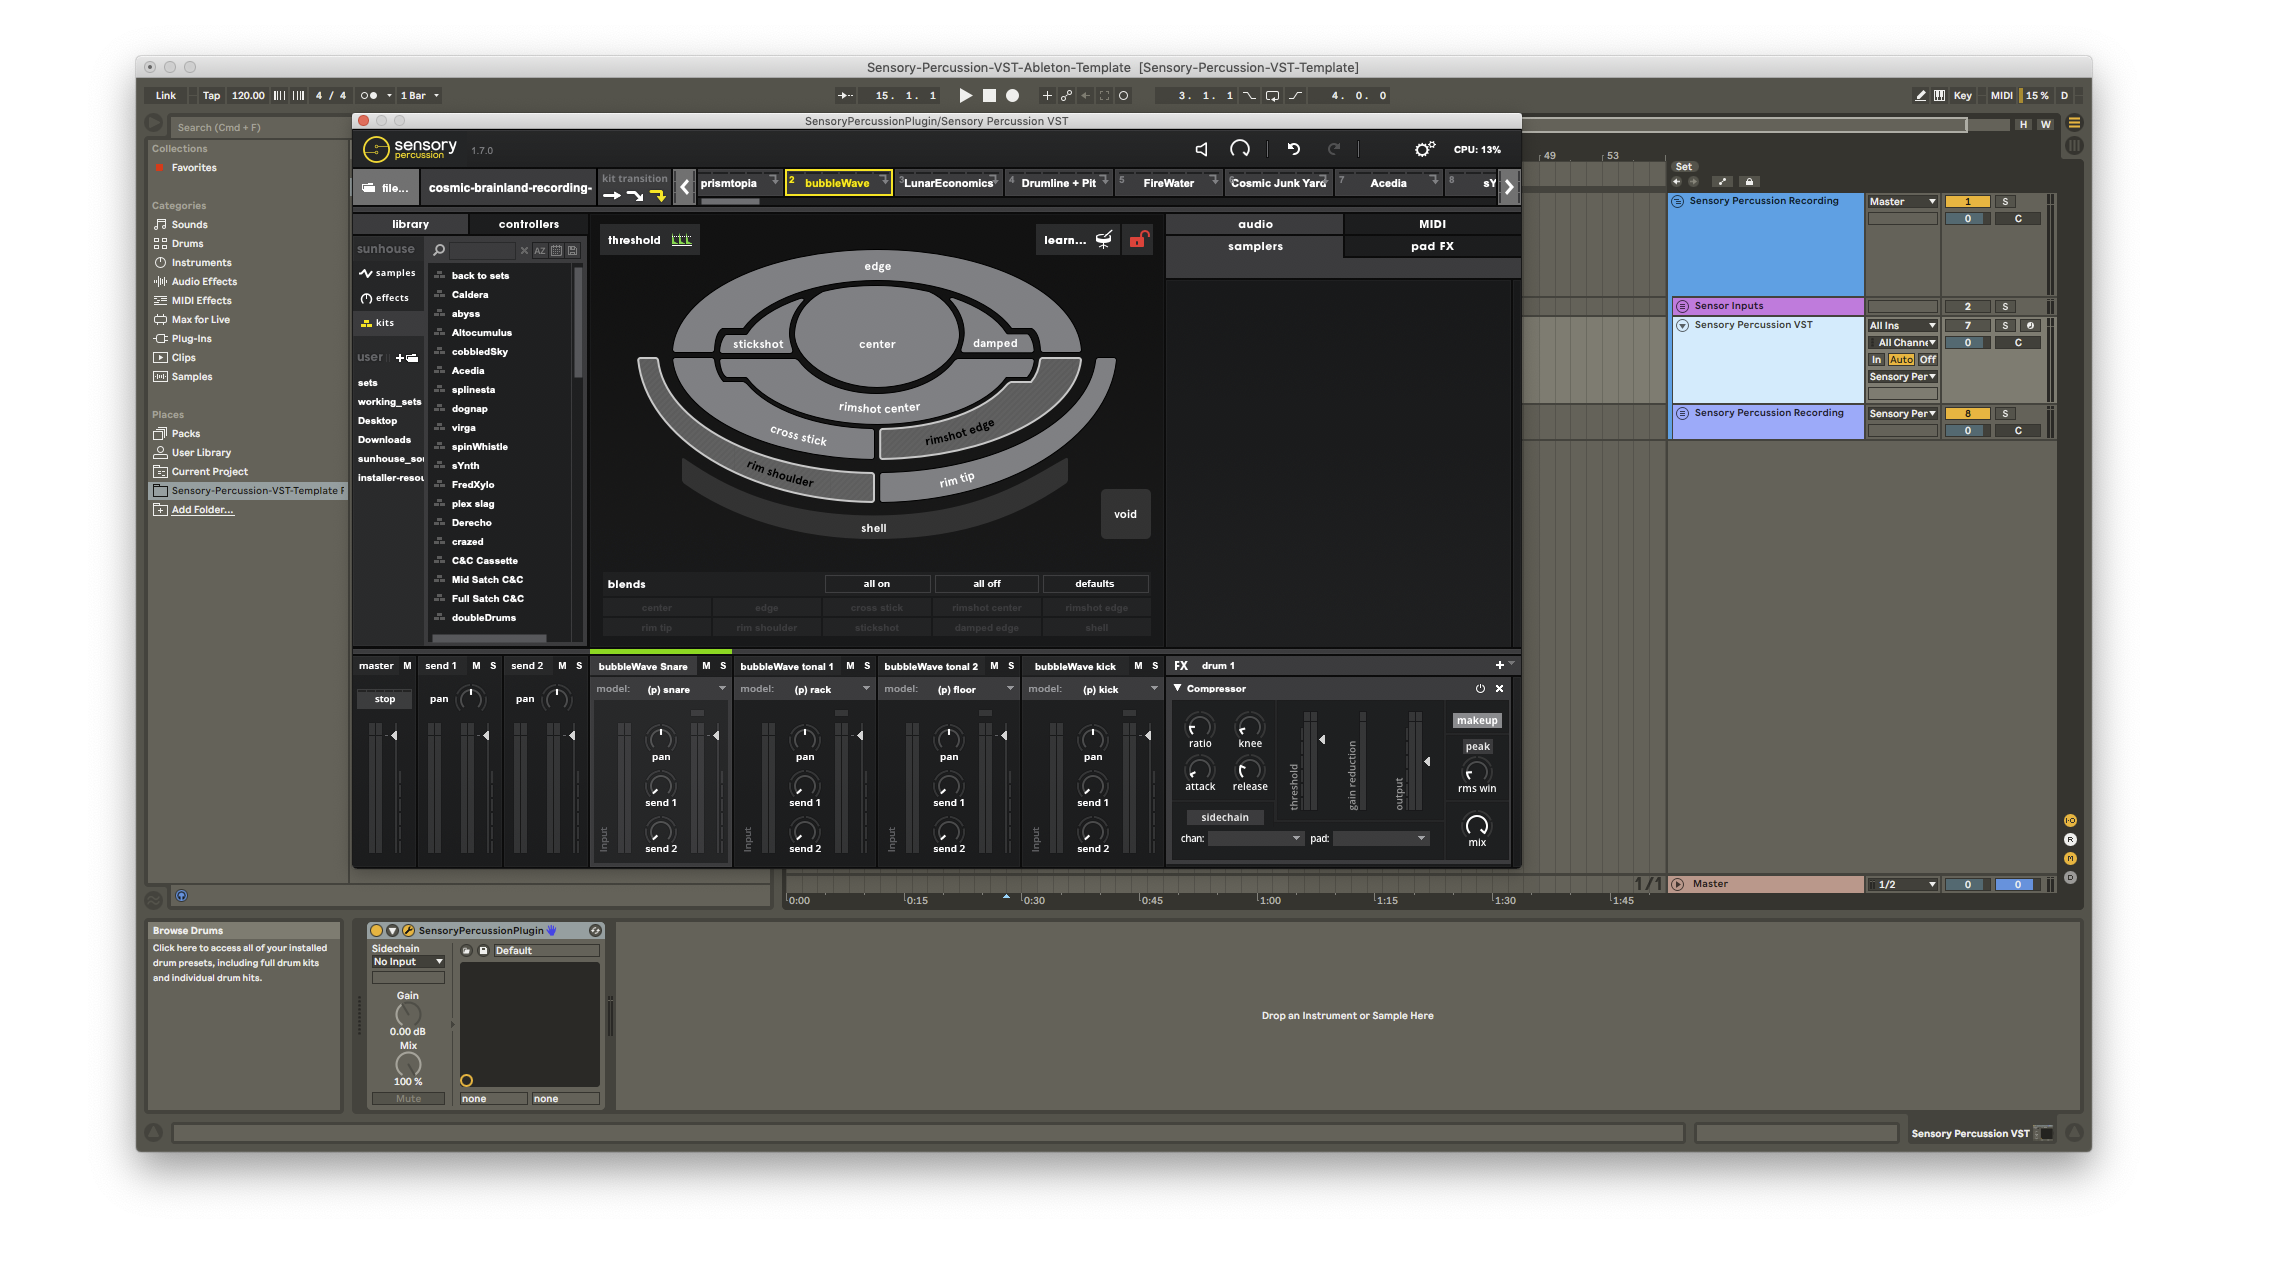
The Sensory Percussion Ableton Plugin has all of the features of the standalone app, but it runs inside Ableton Live 9+. It will load inside other DAWs that support VSTs, but full usage of all four channels is restricted by the DAW's ability to route multi-channel audio into VST effects. In our tests, Ableton is the only DAW that supports this.
The plugin is for Windows and macOS 64-bit only.
We recommend that you download the template and read along with this manual article to get a full understanding of how it works.
Download the Ableton Templates
Download the Ableton Plugin Templates
How it works
You can drag and drop the full Sensory-Percussion-VST-Ableton-Template.als into the Mixer Drop Area of your current Ableton session. This is helpful so that you don't have to keep saving-as to avoid overwriting the template.
The steps that follow are for creating a recording session from scratch. You can follow along with the template, or start from an empty Live session.
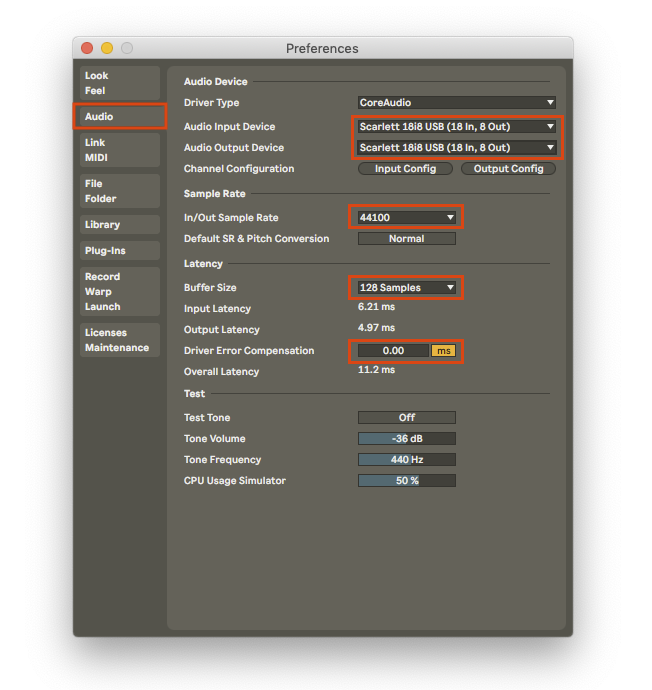
1. Select your interface as the I/O for Ableton:
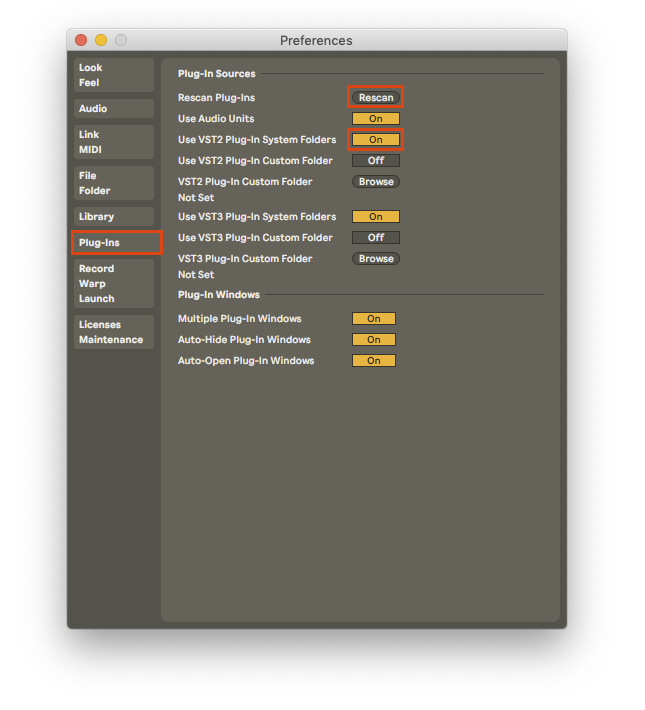
2. Rescan Plug-Ins in Preferences>Plug-Ins:
3. Double click on the SensoryPercussionPlugin in the system VST folder:
4. Create channels to route the signal from your sensors into Sensory Percussion.
Create channels for the sensors (Group them if you want):
Name the channels if you want:
Route them correctly, each channel should be recieving an audio signal from one of your sensors:
And passing that signal to the corresponding input of the plugin:
Arm the channels:
5. Open the Sensory Percussion plugin and train Sensory Percussion just like you usually would. Or load your usermodels if you have trained in the standalone app recently.
6. Drag in a kit or start making a new kit
7. Create, route and arm audio channels to receive the audio from Sensory Percussion Plugin.
Create channels to receive audio from the plugin (Group them if you want):
Name the channels if you want:
Route them correctly. Each channel should be receiving audio from a mixer track in Sensory Percussion:
Arm the channels when you are ready to record:
8. Record Sensory Percussion channels before, during, or after recording of the sensor's audio.
In the template we have muted the playback of Sensory Percussion audio tracks group: 
That is because we are monitoring playback through the Sensory Percussion VST. If you want to listen to the recorded audio tracks, you can unmute the Sensory Percussion audio tracks group, and mute the Sensory Percussion VST.
MIDI
Getting MIDI into the Sensory Percussion Ableton Plugin
Just like in the standalone app, you can use a MIDI controller to control almost any parameter inside the Sensory Percussion Ableton plugin. An external MIDI controller can be a helpful device to change kits, turn on/off samplers, mute tracks, and adjust the volume of the main track, along with many other things.
Here's a step-by-step guide for getting Ableton to recognize your external MIDI controller and then routing into the Sensory Percussion plugin:
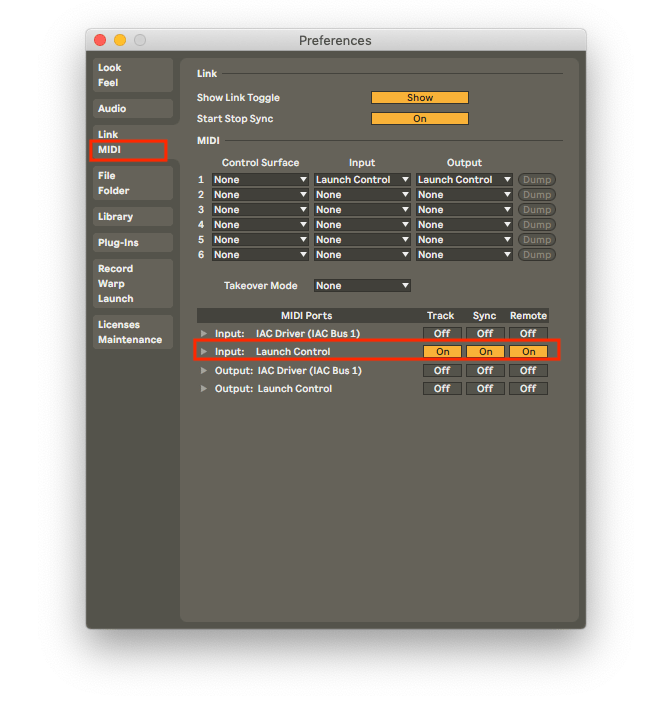
- In Ableton's MIDI preferences, select the MIDI device that you want to control Sensory Percussion with:
If you don't see your device in the preferences menu, you'll most likely have to install a driver for your MIDI device.
- Create a MIDI channel and select your MIDI controller as the input for that channel, and SP Plugin as the output for that channel. Select any of the 16 channels labeled SensoryPercussionPlugin as the sub output for the MIDI channel, but do not select the default Track In:
- Open up the Sensory Percussion plugin and select the controllers tab and then click on Ext.Auto, click the "+" and choose MIDI Input from the drop down menu.
In the controller that appears click "learn" and manipulate a parameter on your physical device. You will notice that the number box labeled "note value" now displays a number value that corresponds to that parameter of your MIDI device:
Now you'll be able to assign that controller to almost any parameter inside the Sensory Perucssion plugin. Repeat step 3 for each of the buttons on your physical MIDI device that you want to assign to parameters in Sensory Percussion.
Routing MIDI out of the Sensory Percussion Plugin
To send MIDI notes from the zones of Sensory Percussion to instruments and VSTs in Ableton you simply need to select the Sensory Percussion Plugin as an input for a MIDI channel.
- Create a MIDI channel in a session that has the Sensory Percussion Ableton Plugin setup.
- Select SP Plugin as the input for the MIDI channel.
- Select SensoryPercussionPlugin for its channel input.
- Record enable the MIDI channel.
Then you can assign MIDI effects, Ableton Instruments, and VSTs to the MIDI channel and control it with notes from Sensory Percussion.
Ableton sums all of the MIDI data coming out of the Sensory Percussion Plugin into just one channel, i.e., Sensory Percussion's MIDI channels 1,2,3, and 4 will all be sent out of the same channel.
Additionally, MIDI CC messages from the plugin cannot directly control elements of Ableton's UI. In order to control knobs, buttons, and faders in Ableton from the Sensory Percussion plugin, you either have to:
-
Send MIDI from the Sensory Percussion Plugin out of an external bus, and then route the MIDI back into Ableton.
-
Use a Max for Live device like Max Api CtrlMIDIcc.amxd (availble in this pack)